Last Updated on February 12, 2024 by teamobn
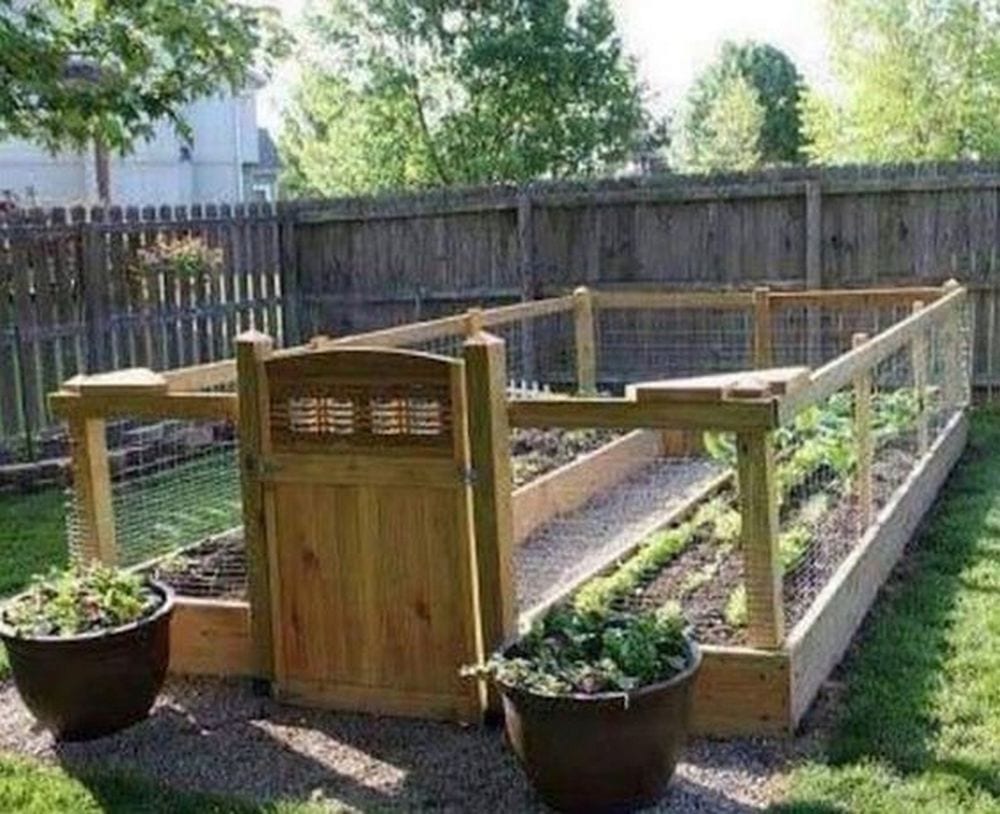
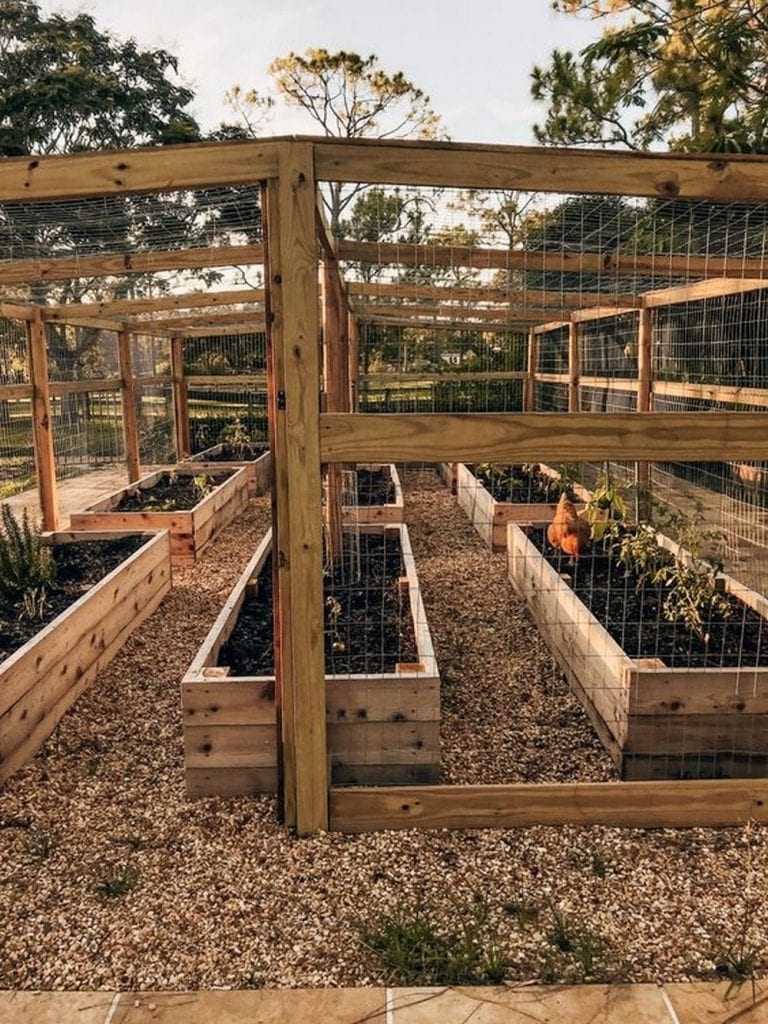
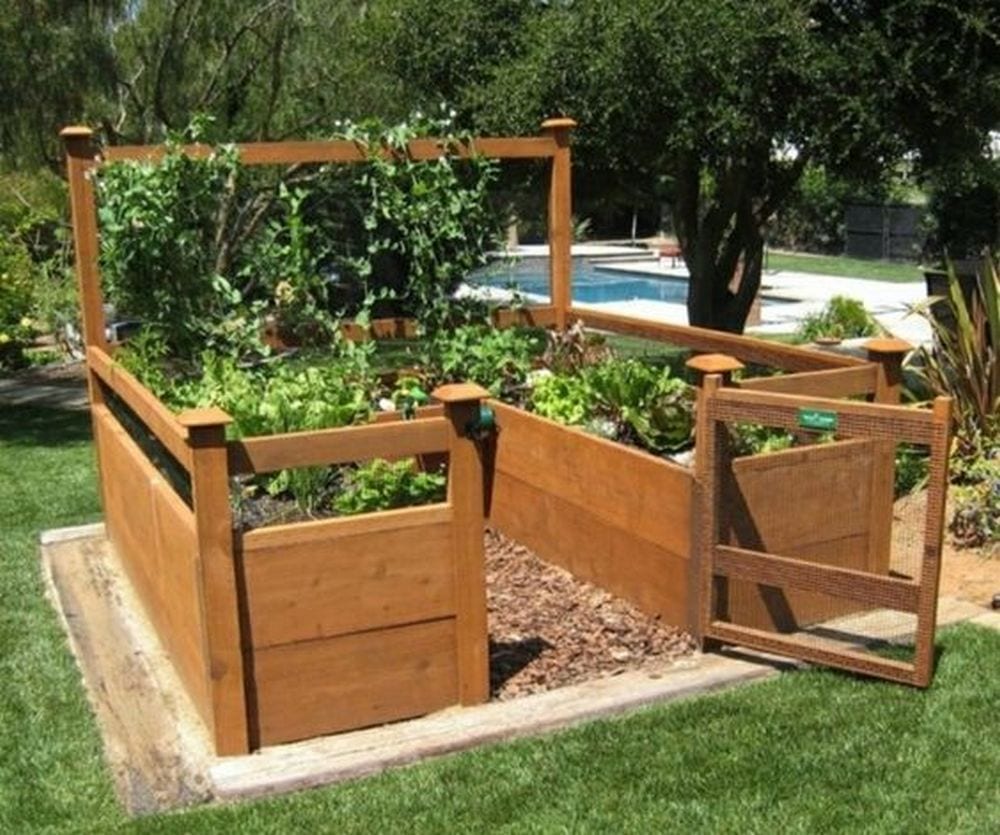
Gardening is fun, but not if you have to deal with annoying creatures that destroy your beloved plants. Rats and squirrels, among many others, could sometimes sneak up on you. They could damage your garden. But here’s a great DIY project that will help address this issue. Build a raised and enclosed garden bed!
A raised and enclosed garden bed will keep unwanted animals off your plants. A raised one, on the other hand, will make gardening a lot easier. Imagine not needing to bend the whole way down!
You can pull out weeds, and check on the vegetable growth and health of our plants while standing or comfortably seated. This will make working in your garden a good deal more pleasant – especially if you have lower back issues.
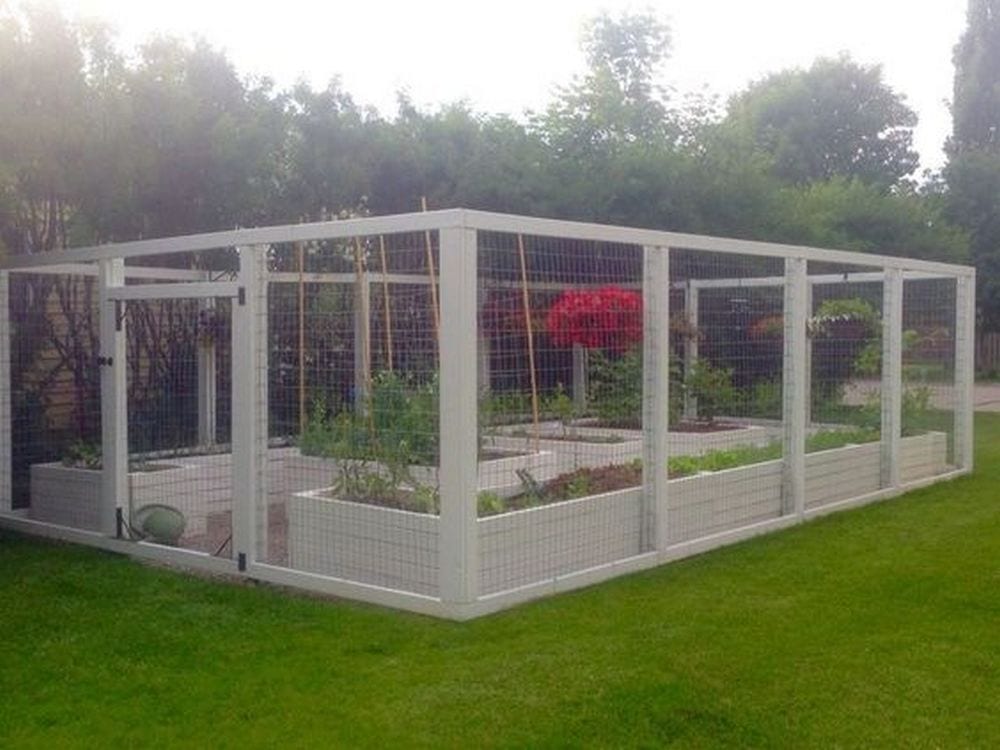
Raised and enclosed garden beds can be an attractive addition to your garden, providing a structured and organized appearance. Plant roots in raised beds have better access to oxygen, which supports healthier and more vigorous plant growth.
Because in a raised and enclosed garden bed, it’s less likely to become compacted, ensuring better root development. The raised edges of the bed help to prevent erosion, especially on sloped terrain.
Drip irrigation systems can also be more easily installed and managed in raised and enclosed garden beds, leading to efficient and targeted watering.
If woodworking isn’t your strongest skill, don’t worry. Ask for some help from family and friends who are good at it. The lack of skill shouldn’t stop you from doing such a great project.
Crafting a DIY raised and enclosed garden bed in 11 effortless steps brings several advantages:
- Optimized Soil Conditions: By elevating the garden bed, you can ensure better drainage and aeration of the soil, fostering healthier root development and plant growth.
- Enhanced Weed Control: Raised beds help minimize weed growth by providing a barrier between the soil and surrounding area, reducing the need for time-consuming weeding.
- Improved Accessibility: The raised design makes it easier to reach plants, reducing the strain on your back and knees during planting, watering, and harvesting activities.
- Extended Growing Season: Raised beds warm up faster in the spring, allowing for earlier planting and an extended growing season, which can lead to higher yields.
- Customizable Design: DIY raised beds offer flexibility in size, shape, and materials, allowing you to tailor them to fit your garden space and aesthetic preferences.
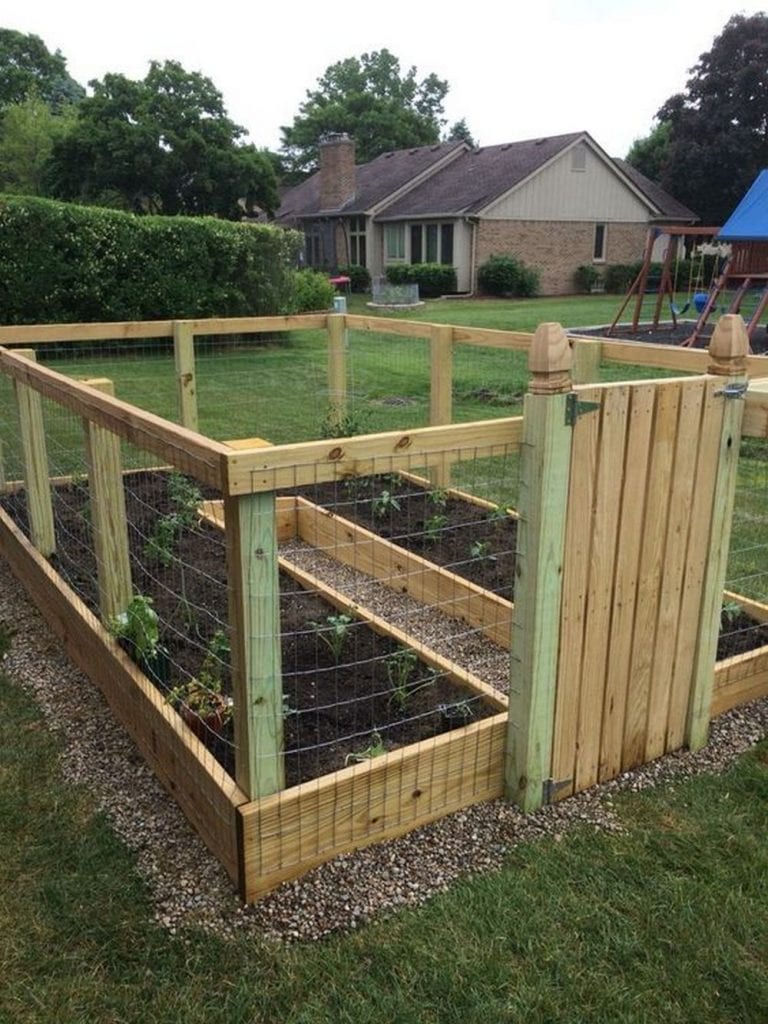
- Better Pest Management: Enclosing the garden bed with barriers such as netting or mesh can help protect plants from pests like insects, birds, and small animals, preserving your crops.
- Maximized Space Utilization: Raised beds allow for closer planting and intercropping, maximizing the use of limited garden space and increasing overall productivity.
- Soil Conservation: Raised beds help prevent soil erosion and compaction, preserving soil structure and fertility for long-term garden health.
- Enhanced Drainage: Raised beds are ideal for gardens with poor drainage or heavy clay soils, as they provide a controlled environment where excess water can easily drain away.
- Educational Opportunity: Building and maintaining a raised garden bed offers valuable learning experiences for gardeners of all ages, teaching important skills such as planning, problem-solving, and plant care.
- Aesthetic Appeal: Raised beds add visual interest to the garden landscape, creating defined planting areas and a tidy, organized appearance.
In conclusion, embarking on the journey of creating a DIY raised and enclosed garden bed brings numerous benefits, from improved soil conditions and weed control to enhanced accessibility and extended growing seasons. With minimal effort and resources, you can enjoy a productive and beautiful garden space that nurtures both plants and gardeners alike.
How to Make a Raised and Enclosed Garden Bed
Contents
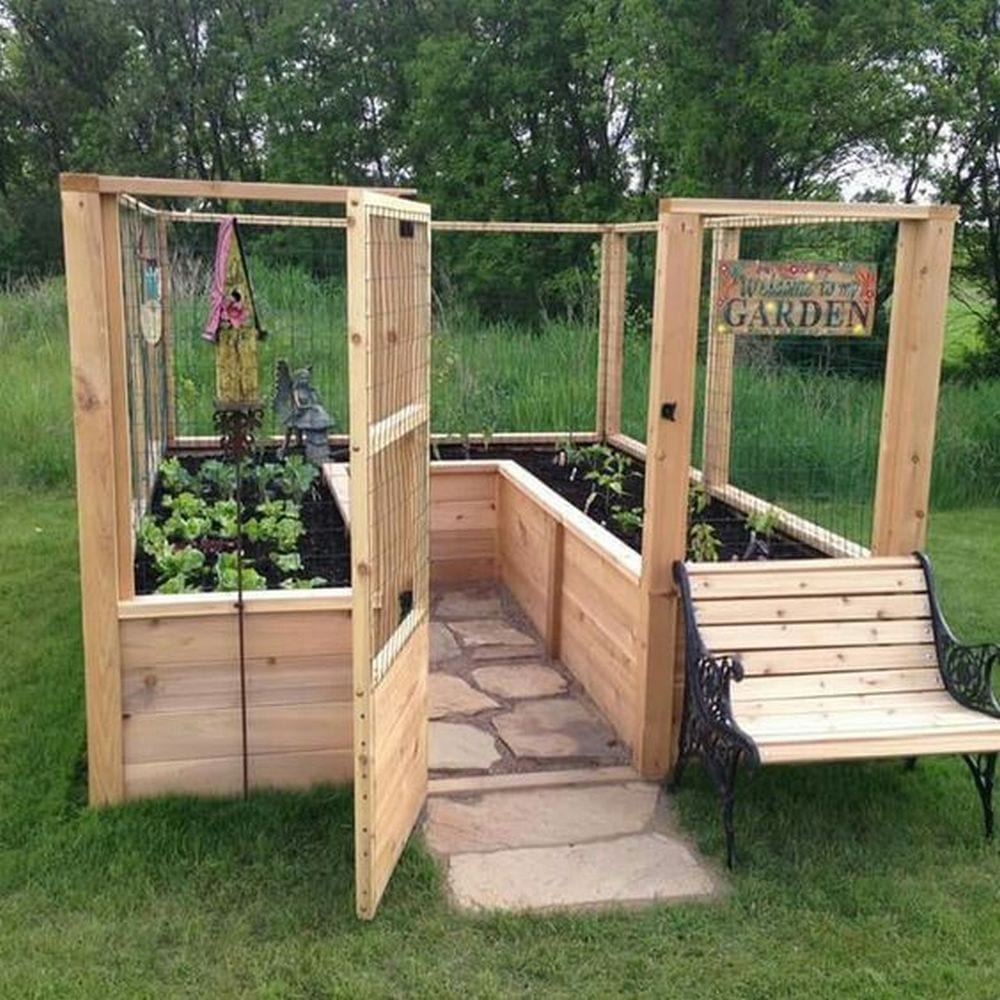
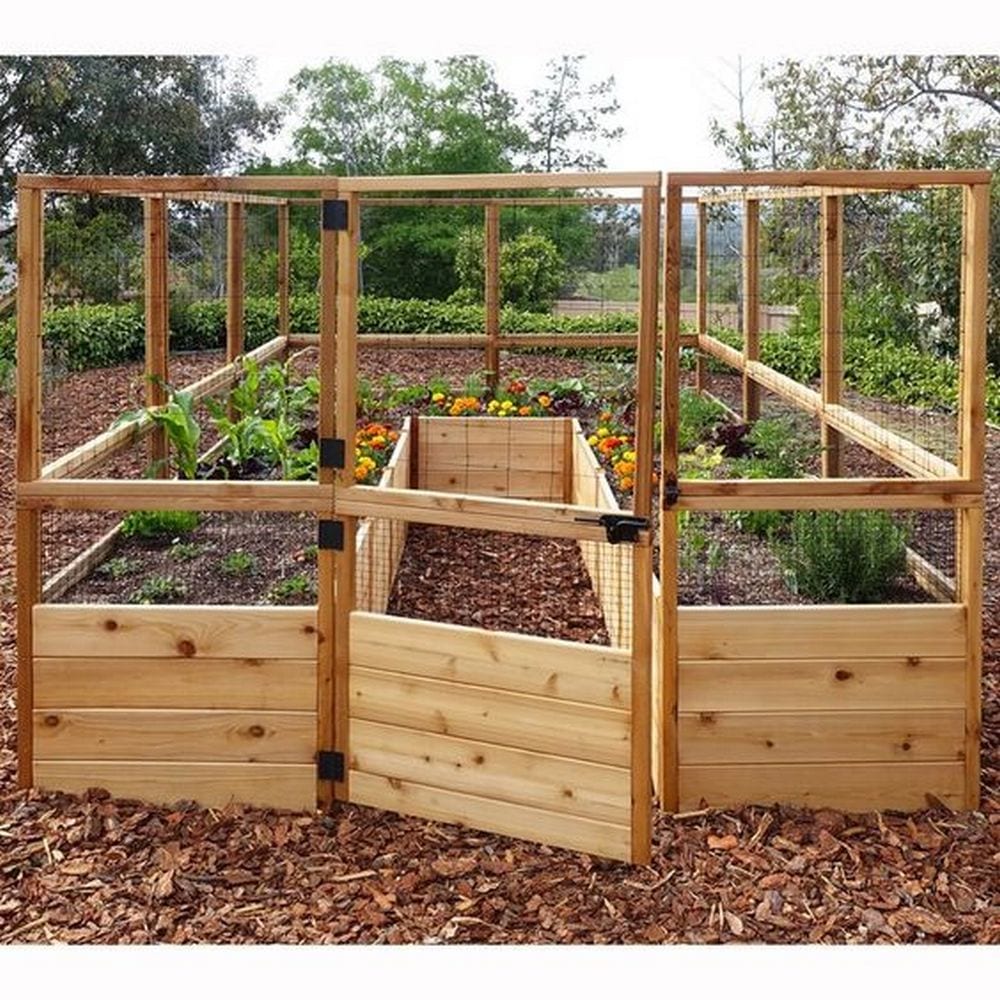
Welcome to the world of gardening elevated to new heights! In this step-by-step guide, you’re about to embark on a journey that will transform your ordinary garden into a thriving oasis of greenery and protection.
Discover the art of crafting a raised and enclosed garden bed, where your plants will flourish, your creativity will bloom, and your gardening dreams will take root like never before. Get ready to raise the bar on your gardening game, as you learn how to create a garden that’s not just protected but thriving in style!
Materials
- 2”x4” Timber
- 2”x3” Timber
- 8’x2”x10” Boards
- 67”x4”x4” Timber Posts
- 3” Deck Screws
- 2-1/2” Deck Screws
- Plastic Mesh
- Door Hinges
- Door Latch
Tools
- Measuring Tape
- Drill
- Driver
- Hand Staple Gun
- Compound Miter Saw
- Speed Square
- Level
- Utility Knife
Click on any image to start the lightbox display. Use your Esc key to close the lightbox.
Steps
Step 1: Cut Timber for the Garden Bed Frame
Using a compound mitre saw, carefully cut the 2”x4” and 2”x3” timber to the desired lengths for the garden bed frame. Determine the measurements for the length and width you want.
Step 2: Assemble the Garden Bed Frame
Construct the frame by attaching the cut pieces of timber using 3” deck screws. Use a speed square to ensure right angles.
Step 3: Install Corner Posts
Attach the 67”x4”x4” timber posts at each corner of the bed using 3” deck screws. These will serve as the corner supports for your garden.
Step 4: Cut Timber for the Garden Bed Frame
Using a compound mitre saw, carefully cut the 2”x4” and 2”x3” timber to the desired lengths for the garden bed frame.
Step 5: Assemble the Garden Bed Frame
Construct the frame by attaching the cut pieces of timber using 3” deck screws. Use a speed square to ensure right angles.
Step 6: Install Corner Posts
Attach the 67”x4”x4” timber posts at each corner of the bed using 3” deck screws. These will serve as the corner supports for your garden bed.
Optional Step: Add Support Beams
For added stability, attach 2”x3” timber supports along the longer sides of the frame using 3” deck screws.
Step 7: Attach the Bottom Boards
Lay the 8’x2”x10” boards across the bottom of the frame. Secure them in place using 2-1/2” deck screws. These boards will form the base of the garden bed.
Optional Step: Install the Plastic Mesh
Using a hand staple gun, attach plastic mesh along the inside perimeter of the frame. This will help keep pests out while providing for proper ventilation.
Step 8: Make the Door
Measure and cut a section of the 2” x 4” timber to make the door. Attach hinges to one side and a latch to the other, ensuring it fits securely within the frame.
Step 9: Attach the Door
Mount the door within the frame using the installed hinges. Make any necessary adjustments to ensure it functions smoothly.
Step 10: Level the Bed
Use a level to ensure the garden bed is evenly balanced. Make adjustments as needed by adding or removing soil beneath the bed.
Step 11: Fill and Plant
Fill the bed with your choice of soil and begin planting your desired plants, herbs, or vegetables.
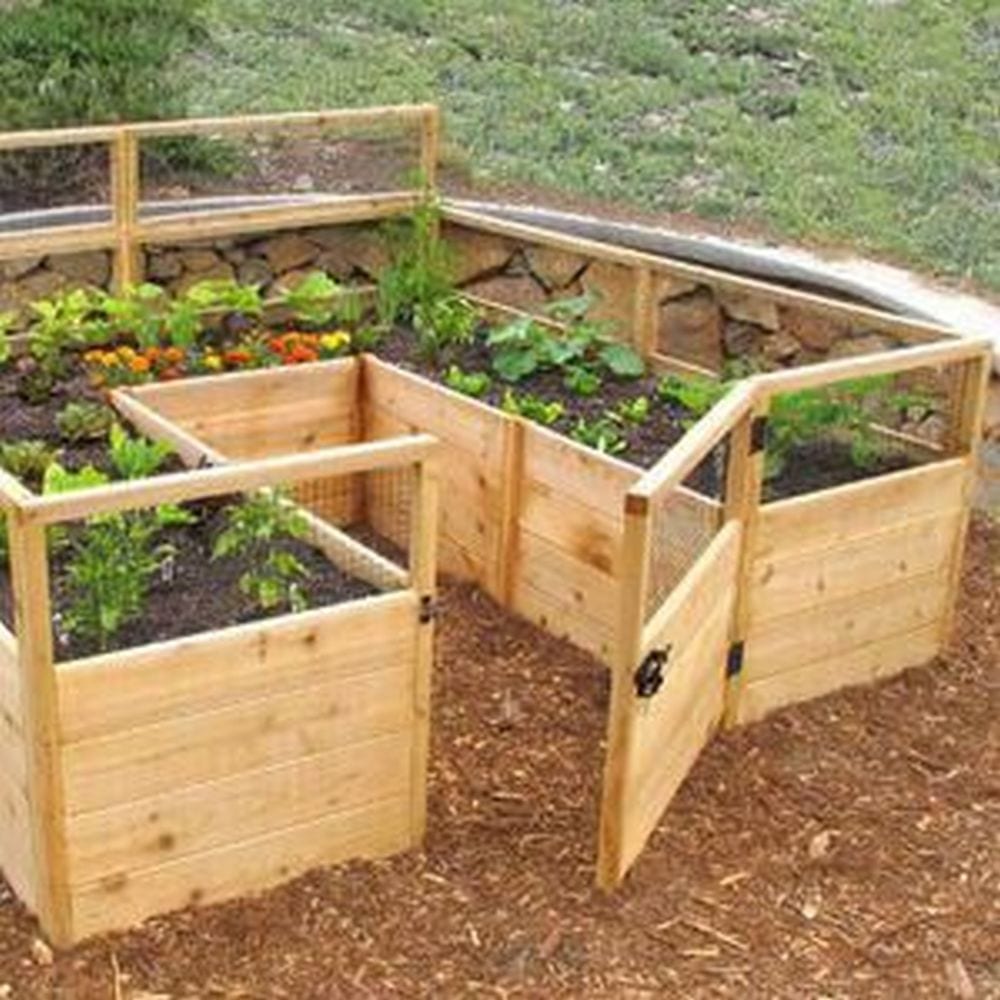
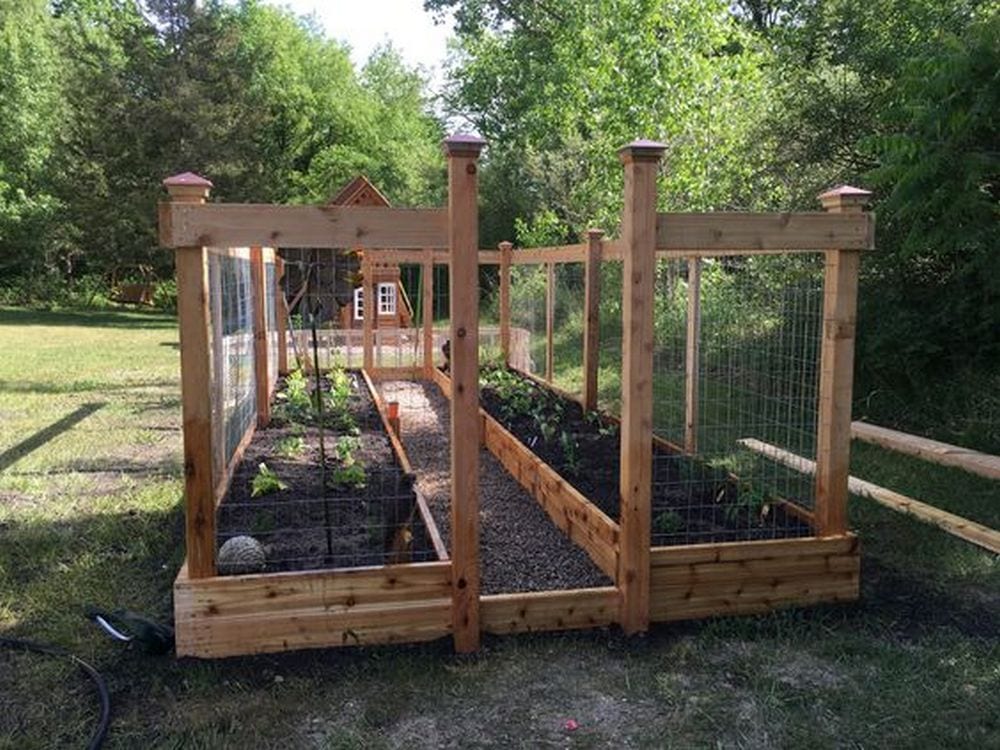
Congratulations! Now, you can enjoy your own raised and enclosed garden bed. This functional structure will enhance your garden’s aesthetics and provide a protected space for your plants to thrive.
Special thanks to Clover and Thyme for sharing invaluable ideas on how to make a raised and enclosed garden bed.
Planting in a raised and enclosed garden bed offers a range of advantages, and employing certain strategies can further enhance your gardening experience. Here are some pro tips for planting in raised and enclosed garden beds:
1. Vertical Gardening: Utilize trellises, stakes, or vertical structures to grow vining plants vertically, such as tomatoes, cucumbers, or pole beans. Vertical gardening maximizes space efficiency, encourages better air circulation, and makes harvesting easier.
2, Succession Planting: Plan your planting schedule to ensure a continuous harvest throughout the growing season. As one crop is harvested, promptly replant the space with a quick-maturing variety or a different crop to maximize productivity and make the most of limited space.
3. Square Foot Gardening: Adopt the square foot gardening method, which involves dividing the raised and enclosed garden bed into square foot sections and planting specific crops in each section according to recommended spacing. This approach optimizes space utilization, simplifies planting, and facilitates crop rotation.
4. Companion Planting: Take advantage of companion planting by strategically pairing compatible plants that benefit each other. For example, planting aromatic herbs like basil or marigolds alongside vegetables can help repel pests and improve overall plant health.
5. Intensive Planting: Plant crops more closely together than you would in traditional garden beds to maximize yields and make efficient use of space. Intercropping, where different crops are grown together in the same bed, can further optimize space and encourage biodiversity.
6. Raised Bed Covers: Install removable or row covers to protect plants from pests, harsh weather conditions, and temperature fluctuations. Covers can extend the growing season, reduce pest damage, and promote healthier plants. The installation of removable covers has the remarkable ability to extend the growing season, allowing you to enjoy fresh produce for longer periods.
By trapping heat and creating a warmer microclimate, the covers enable you to start planting earlier in the spring and continue growing later into the fall. This extension of the growing season opens up new opportunities for crop selection and succession planting, maximizing the productivity and diversity of your garden.
7. Mulching: Apply organic mulch, such as straw, shredded leaves, or compost, to the soil surface to suppress weeds, retain moisture, and regulate soil temperature. Mulching also improves soil fertility as it decomposes over time.
Also, in cooler temperatures, mulch provides insulation, helping to retain warmth and protect roots from frost damage. This temperature-regulating effect ensures that your plants can thrive year-round, regardless of external weather fluctuations.
8. Water Management: Use drip irrigation or soaker hoses to deliver water directly to the root zone of plants, minimizing water waste and reducing the risk of foliar diseases. Monitor soil moisture regularly and adjust watering frequency based on plant needs and weather conditions.
9. Soil Amendment: Amend the soil in your raised and enclosed garden bed with compost, aged manure, or organic fertilizers to improve soil structure, fertility, and drainage. Regular soil testing can help you maintain optimal nutrient levels for healthy plant growth.
By incorporating these pro strategies into your planting approach, you can create a thriving and productive raised and enclosed garden bed garden that yields abundant harvests and fosters a healthy, sustainable growing environment.
Rise Above With a DIY Enclosed Bed
Unleash your inner gardener with this 11-step guide to crafting a DIY raised and enclosed garden bed. Elevate your gardening game and protect your green treasures from pests and the elements. With simple materials, basic tools, and a dash of creativity, you’ll transform your outdoor space into a lushing paradise.
From assembling the sturdy frame to adding a secure door to levelling the bed, every step is designed to make your gardening journey a breeze. Say hello to a garden that’s not only beautiful but also brilliantly functional. Get ready to grow confidently and style with a raised and enclosed garden bed!
Are you ready to get started? The first step is gathering the building blocks of your horticultural vision. Prepare to gather those essential materials and tools, as well as some ingenuity.
Frequently Asked Questions
1. What materials do you need to build a raised and enclosed garden bed?
You’ll typically need lumber for the frame, such as cedar or pressure-treated wood, screws or nails for assembly, and hardware cloth or chicken wire for enclosing the bed.
2. How much space do you need for a raised and enclosed garden bed?
The size of your garden bed depends on your available space and gardening goals. You can customize the dimensions to fit your needs, but a common size is around 4 feet wide by 8 feet long.
Whether you have a sprawling backyard or a compact urban balcony, you can customize the dimensions of your raised and enclosed garden bed to suit your specific needs and preferences.
3. Do you need any special tools for building a raised and enclosed garden bed?
Basic carpentry tools like a saw, drill, and measuring tape are usually sufficient. If you’re adding a cover, you may also need wire cutters and a staple gun.
4. What’s the best location for a raised and enclosed garden bed?
Choose a sunny spot with good drainage for your garden bed. Avoid areas with large trees or roots that may compete with your plants for water and nutrients.
Aim for a location that receives at least 6-8 hours of direct sunlight per day, as most vegetables, herbs, and flowers require ample sunlight to thrive. Adequate sunlight promotes healthy plant growth, and flower and fruit production, and enhances the flavor and nutritional value of crops.
5. How deep should a raised and enclosed garden bed be?
Aim for a depth of at least 12 inches to provide ample room for root growth. However, deeper beds, up to 18-24 inches, allow for a wider range of plants and better moisture retention.
In cooler climates, deeper beds offer thermal insulation and protection against frost, enabling gardeners to start planting earlier in the spring and extend the growing season into the fall. Deeper soil retains heat more effectively, creating a warmer microclimate that supports plant growth and protects tender crops from cold snaps.
6. What type of soil should I use in a raised and enclosed garden bed?
Use high-quality garden soil or a mix of topsoil, compost, and other amendments to ensure good fertility and drainage. Avoid using soil from your yard, as it may contain weeds or pests.
7. How do I fill my raised garden bed with soil?
Layer the bottom of the bed with cardboard or newspaper to suppress weeds, then fill it with soil mixture, leaving a few inches of space at the top for planting.
8. Do I need to line the bottom of the raised garden bed?
Lining the bottom with hardware cloth or landscape fabric can help prevent pests like moles or gophers from tunnelling into the bed from below.
9. How often should I water my raised garden bed?
Water requirements vary depending on the weather and the types of plants you’re growing. Generally, aim to keep the soil consistently moist but not waterlogged.
10. What can I plant in my raised garden bed?
Raised beds are versatile and can accommodate a wide range of vegetables, herbs, flowers, and even small fruits like strawberries. Choose plants that suit your climate and gardening preferences.
When selecting plants for your raised bed, consider factors such as sunlight requirements, water needs, and compatibility with neighbouring crops. Tailor your choices to your local climate and gardening preferences, and enjoy the flexibility and productivity that raised beds can offer.
11. How do I maintain my raised garden bed?
Regular tasks include watering, weeding, fertilizing, and monitoring for pests and diseases. Mulching can help suppress weeds and retain moisture, reducing maintenance requirements.
These FAQs cover some of the basic considerations for starting a DIY raised and enclosed garden bed project. Feel free to customize them based on your specific needs and preferences!