Last Updated on May 21, 2024 by teamobn
We hear the line “one man’s trash is another man’s treasure” quite too often. Well, maybe because it’s true. Renovation projects are good sources of recyclable materials – like windows. If you know someone who’s renovating, check to see what you can reuse.
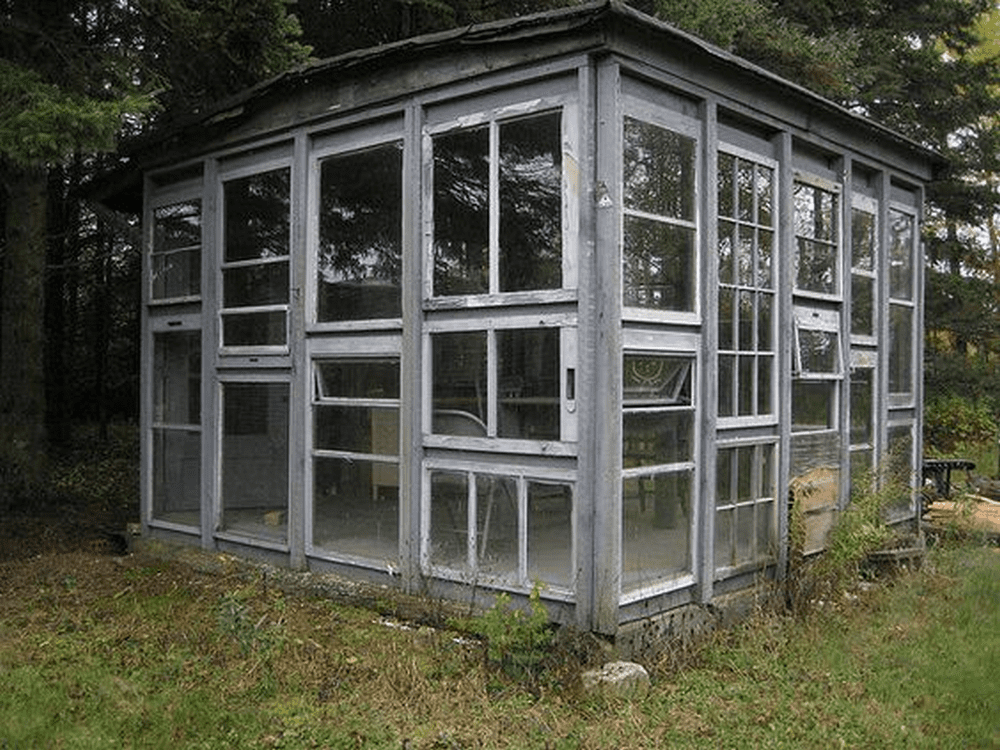
Old windows easily provide you with both timber and glass. With these in place, all you need is a frame to which you can attach the windows. Additional expenses would be on the caulkings, screws, and latches.

One of the most significant benefits is cost savings. Reusing old windows and materials is often much more affordable than purchasing a pre-fabricated greenhouse. It allows you to have a greenhouse on a budget.
Repurposing old windows and materials is an eco-friendly approach, reducing waste and conserving resources. It’s a sustainable way to give old items new life.
Building your greenhouse allows you to design it to suit your specific needs and preferences. You can tailor the size, shape, and features to accommodate your plants and gardening goals.
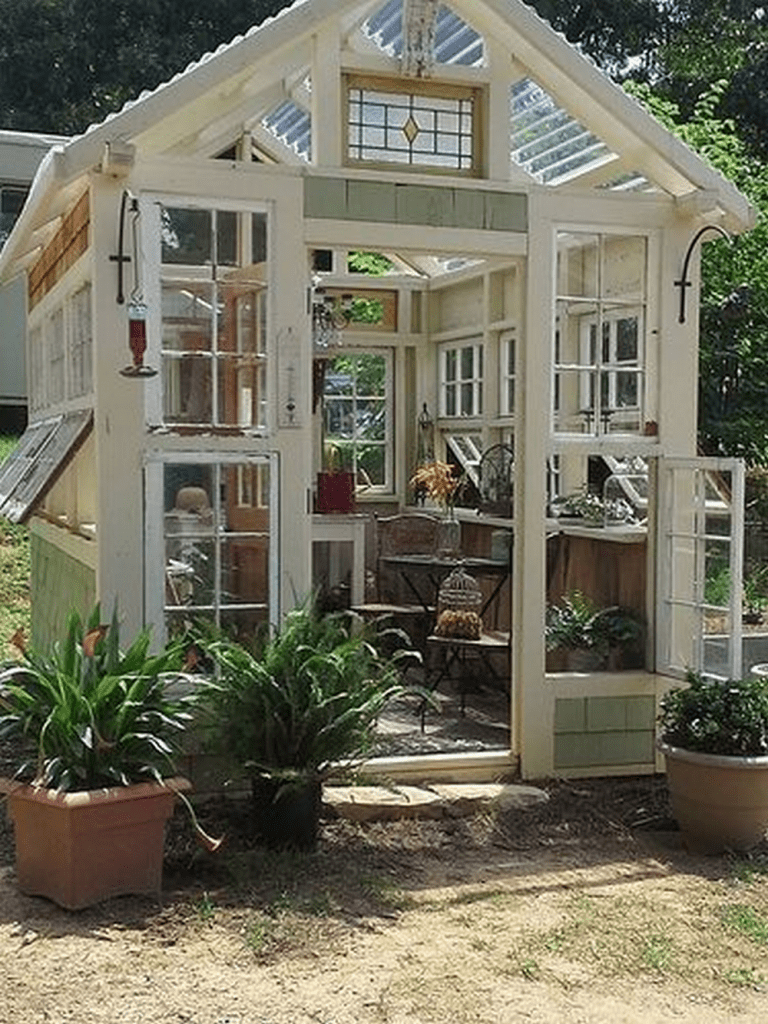
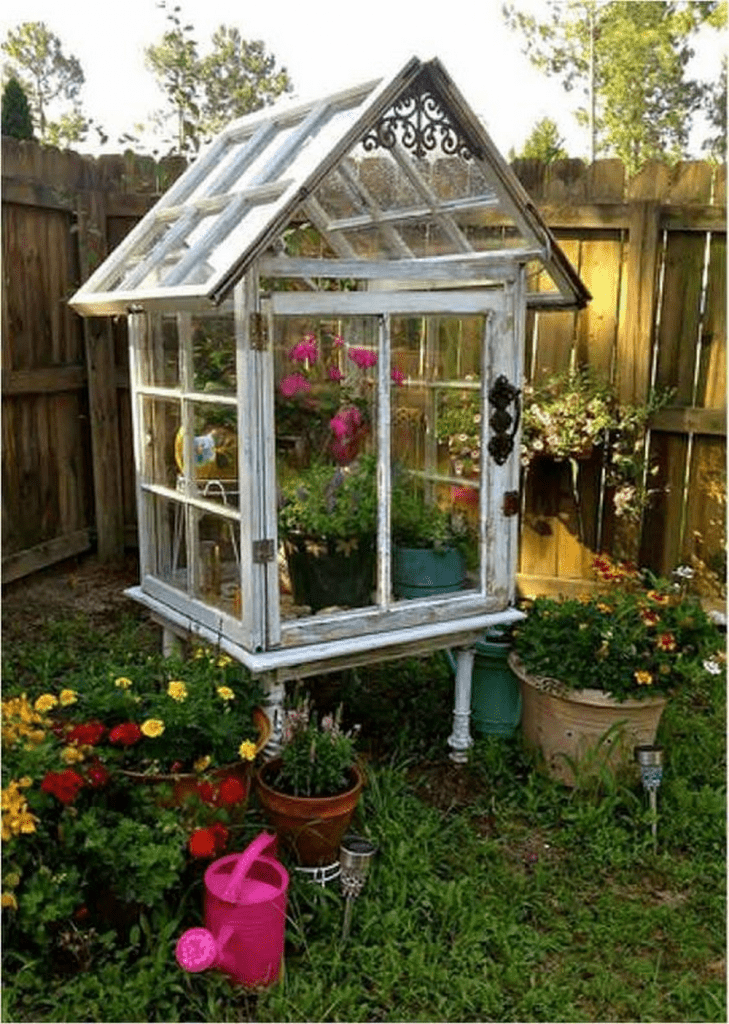
Best of all, DIY greenhouses from old windows have a unique charm and character. They reflect your creativity and style, making your garden space one-of-a-kind.
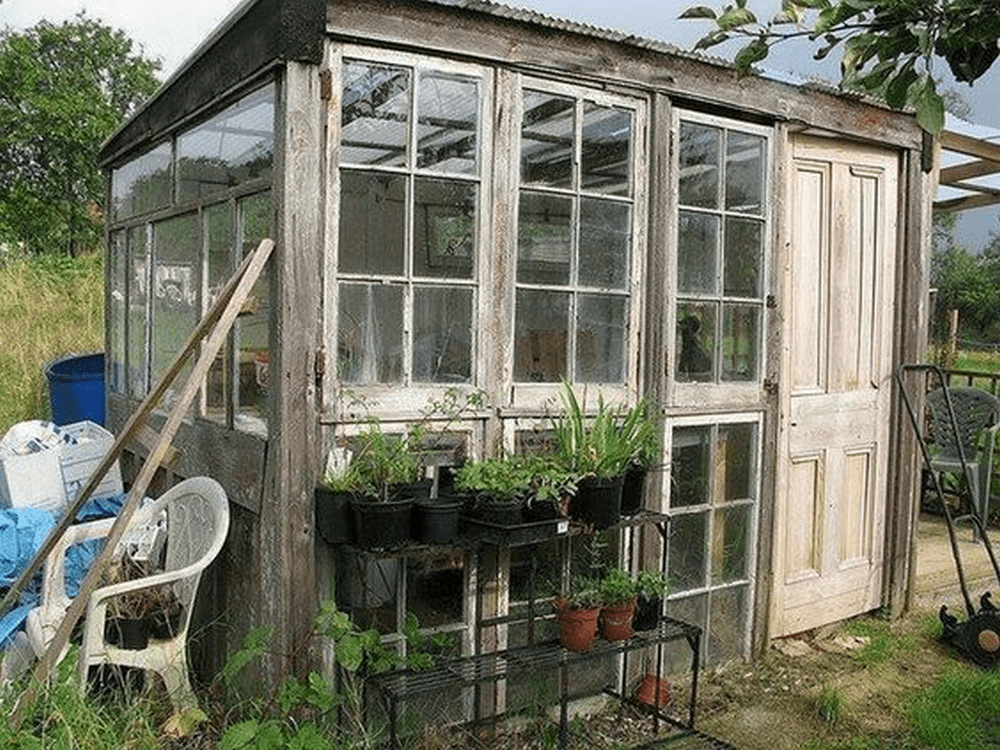
Transform it into a living canvas where plants thrive and nature flourishes. Each window frame, with its unique design and history, becomes a piece of the greenhouse’s personality. The wavy glass panes might carry a hint of nostalgia, whispering tales of a bygone era.
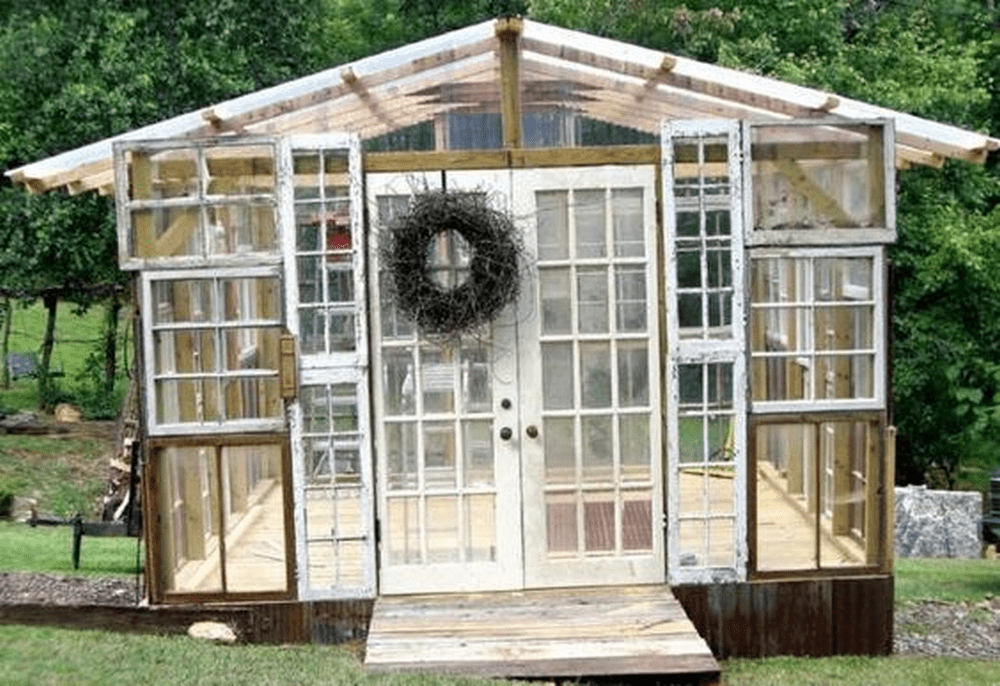
The weathered frames, bearing the marks of time, add a touch of rustic elegance to the overall structure. As you carefully select and arrange these old windows, you’re making deliberate choices that reflect your vision and preferences.
The arrangement of windows, the choice of paint colour, and the way you incorporate decorative elements all contribute to the masterpiece that is your garden haven.
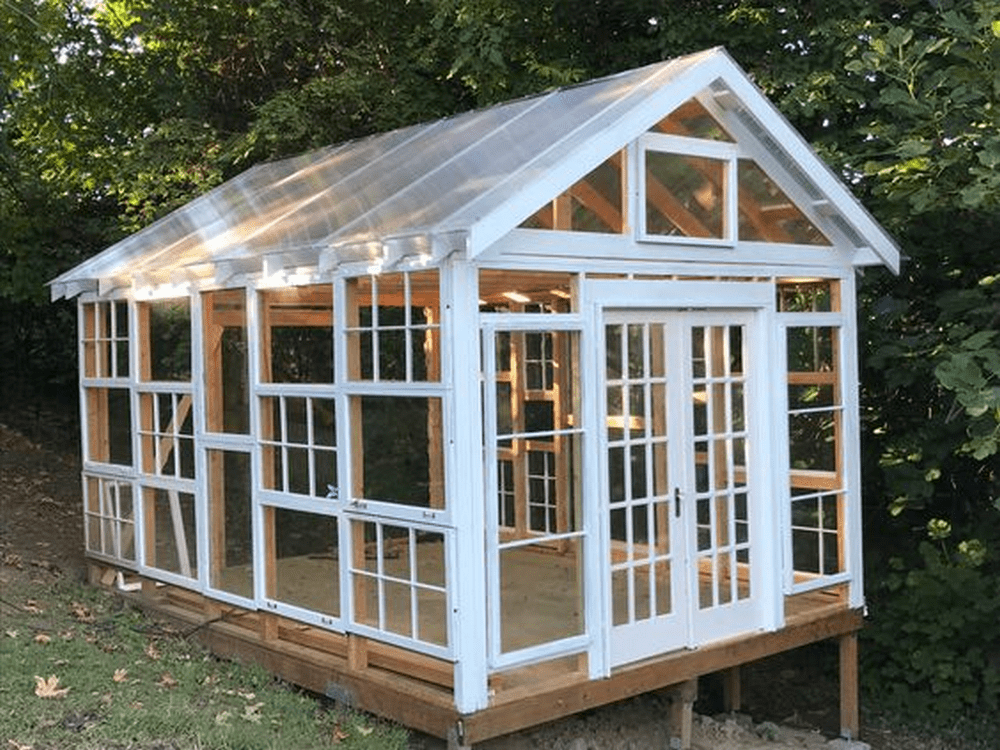
Building a Greenhouse From Old Windows
Contents
At the outset of any undertaking, it’s imperative to verify the availability of essential tools and materials. Whether you’re diving into a do-it-yourself home enhancement initiative, whipping up a fresh recipe, or immersing yourself in a creative crafting endeavour, understanding the prerequisites is pivotal to achieving your desired outcome.
In this part, explore the essential components required to achieve your goals, ensuring that you’re fully prepared to tackle your next adventure with confidence. So, dive in and discover what you need to get started!
Materials
- Old Windows
- Timber – 4×4 and 2×4
- Corrugated Sheets
- Cinder Blocks
- Gravel
- Screws
- Paint
Tools
- Hammer
- Hand Saw
- Measuring Tape
- Paint Brush
- Power Driver/Drill
- Shovel


Instructions
Transforming old windows into a functional and charming greenhouse can be a rewarding project. Here are the steps on how to do it using the listed materials and tools above:
Step 1: Plan Your Greenhouse Design
Determine the size and layout of your greenhouse. Lay out the old windows to create the walls and roof, and use your measuring tape to ensure everything fits together seamlessly.
Step 2: Build the Foundation
Using the 4×4 timber and cinder blocks, create a sturdy foundation for your greenhouse. Level the ground, lay down gravel, and then position the cinder blocks to support the timber frame.
Step 3: Construct the Timber Frame
Using the 2×4 timber and your power driver/drill, build a sturdy frame to support the old windows. Attach the timber to the cinder blocks securely, creating the base for your greenhouse.
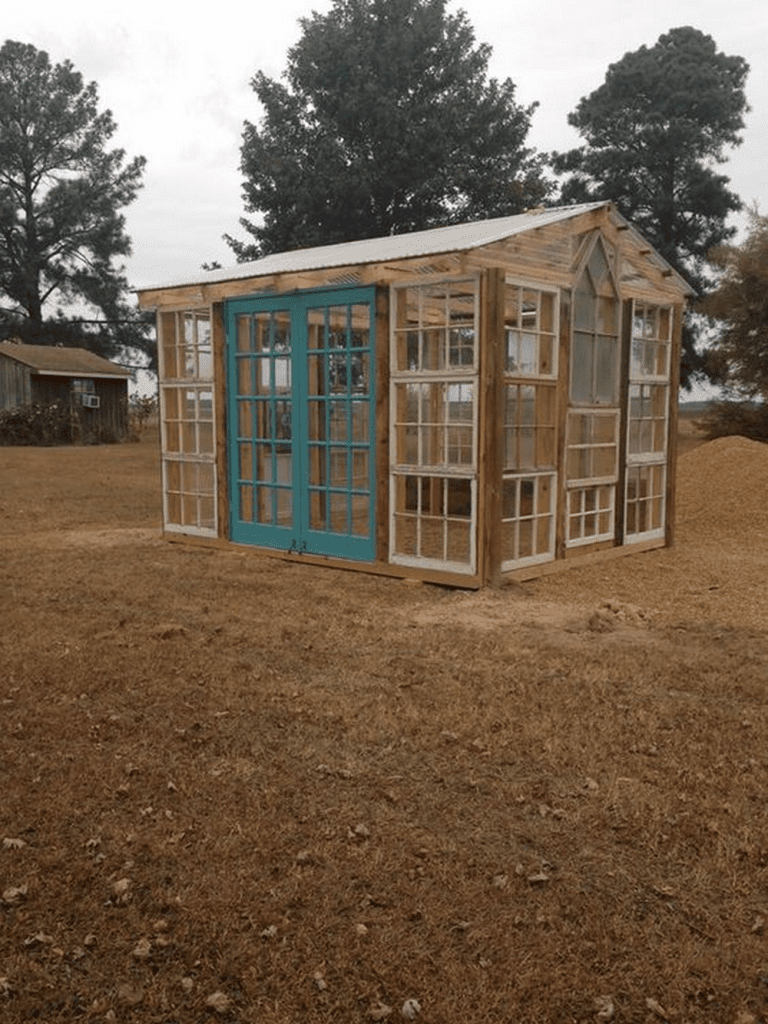
Step 4: Attach the Old Windows
Carefully position the old windows on top of the timber frame. Use screws to secure them in place, making sure they are tightly sealed to prevent drafts.
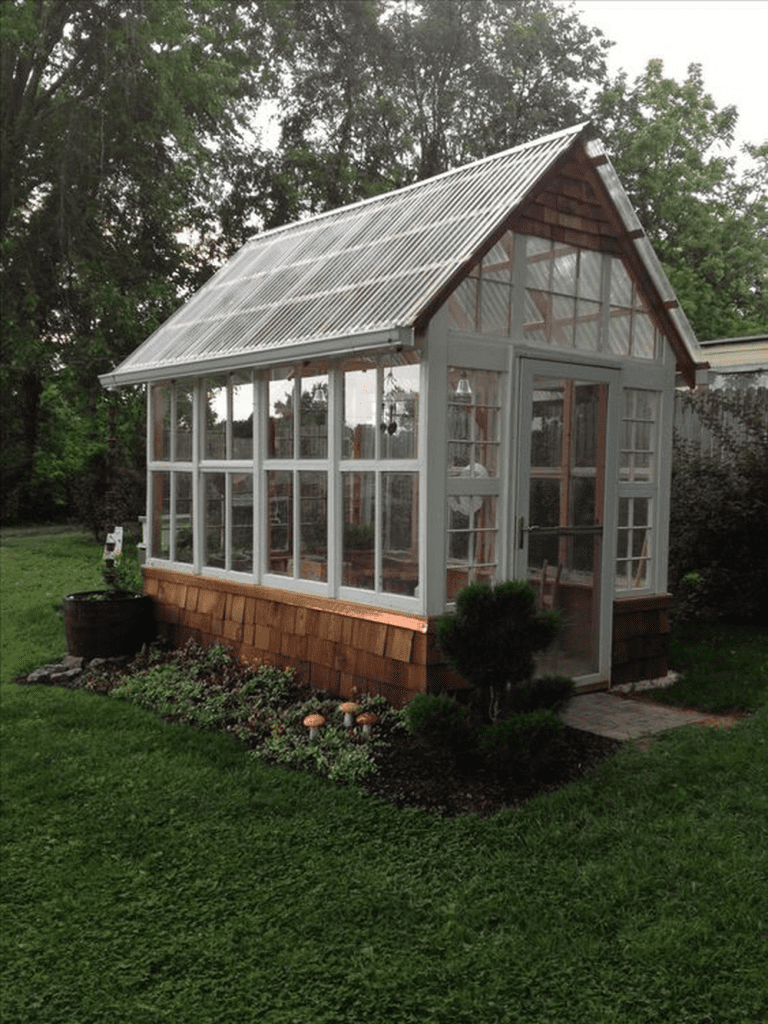
Step 5: Create the Roof
For the roof, use the corrugated sheets. Measure and cut them to fit the top of your greenhouse frame. Attach them with screws to protect them from the elements.
Step 6: Paint and Finish
To protect the wood and give your greenhouse a polished look, use the paint and paintbrush to coat the timber frame. This step is not only practical but also adds a touch of personal style to your greenhouse.
Step 7: Add Final Touches
Once the paint has fully dried, take a moment to step back and appreciate your craftsmanship. To create an even more personalized and functional greenhouse, consider incorporating interior elements such as shelves, benches, or planters. These additions will not only enhance the aesthetics but also ensure an ideal environment for your cherished plants.
Step 8: Start Gardening
Your old windows greenhouse is now ready for use. You can start planting and growing your favorite flowers, herbs, or vegetables, and enjoy the beauty of your DIY creation.
Remember to take your time and work with precision, ensuring each step is completed thoroughly. With these materials and tools, you’ll have a beautiful and functional greenhouse that breathes new life into old windows.
Thanks to Instructables for sharing insights into this unique DIY greenhouse project.
Click on any image to start the lightbox display. Use your Esc key to close the lightbox.
Advanced Weatherproofing Techniques
Creating a DIY greenhouse from old windows not only adds charm to your garden but also requires attention to detail to ensure it withstands various weather conditions. Proper weatherproofing is crucial to protect your plants and extend the lifespan of your greenhouse.
Here, we explore advanced techniques for sealing, insulating, and enhancing thermal retention, making your greenhouse efficient and durable across different seasons.
Selecting the Right Sealants
- Silicone Sealants: Ideal for glass and smooth surfaces, silicone sealants provide a waterproof and flexible barrier. They withstand temperature fluctuations well, making them perfect for sealing window joints against moisture and drafts.
- Acrylic Latex Caulk: This option is more paintable and easier to work with than silicone. It’s suitable for sealing gaps where the frames meet the foundation or other structural parts. Although not as durable in extreme conditions as silicone, it offers a decent level of protection for milder climates.
Insulation Options
- Bubble Wrap: An economical and effective insulator, bubble wrap can be applied directly to the glass panes of your windows. The air pockets in the wrap help retain heat within the greenhouse during colder months.
- Polycarbonate Sheets: For a more permanent solution, consider installing twin-wall polycarbonate sheets. These not only offer excellent insulation but also diffuse light more evenly, which can benefit plant growth.
Enhancing Thermal Retention
- Thermal Curtains: Hang thermal curtains or heavy-duty plastic sheeting inside the greenhouse to create an additional layer of insulation. These can be drawn at night to conserve heat and opened during the day to allow sunlight and air circulation.
- Using Thermal Mass: Objects like stone, concrete, or water containers absorb heat during the day and release it slowly when temperatures drop. Strategically placing these items throughout your greenhouse can help stabilize temperature fluctuations.
Weather Stripping
- V-Strip (or V-Seal): A durable plastic or metal strip that springs open to fill gaps. It is excellent for sealing the movable parts of the windows that may not align perfectly with the frame.
- Foam Tape: This tape is easy to apply and works well in irregular spaces. It’s useful for filling gaps around doors or where different materials meet.
Proper Installation and Maintenance
Ensure that all sealants and insulation materials are correctly installed. Regular checks for gaps, cracks, or wear and tear are vital for maintaining the effectiveness of your weatherproofing measures. Prompt repairs and updates to weatherproofing can save energy and prevent damage to the greenhouse structure and its plant inhabitants.
You can boost the durability and life span of your old window greenhouse by using these weatherproofing methods. While they can take time and money to do, boosting your greenhouse’s defense against the elements ensure a thriving space for your plants and produce.
Integrated Watering Systems
Integrating a watering system into your DIY greenhouse is a smart move for efficient plant care. A tailored watering system can ensure that your plants receive the right amount of moisture without overuse of water, making your gardening efforts more sustainable and less labor-intensive.
Here’s how you can set up a simple yet effective watering system using basic components that can be adapted to suit any greenhouse size or type.
Choosing the Right Watering System
- Drip Irrigation: This system delivers water directly to the base of each plant through a network of tubing and emitters. It’s ideal for conserving water and can be easily customized to fit the specific needs of different plants.
- Misting Systems: Perfect for delicate plants or seedlings, misting systems spray a fine mist that provides humidity and moisture without soaking the soil. They can be particularly useful in hot, dry climates to maintain necessary humidity levels.
Setting Up a Drip Irrigation System
Materials Needed:
- Tubing (main and feeder lines)
- Emitters
- Hose connector
- Water filter (to prevent clogging)
- Pressure regulator (to maintain consistent water flow)
Installation Steps:
- Plan Your Layout: Measure the greenhouse and plan the tubing layout to cover all planting areas. Use stakes to mark the route if necessary.
- Assemble the Main Line: Connect your main line to a water source with a hose connector. Include a filter and a pressure regulator in this setup.
- Run Feeder Lines: From the main line, run feeder lines along the rows of plants. Cut the tubing where each plant is located and install emitters.
- Secure and Test: Secure the tubing with ground stakes or clips. Turn on the water to test the system and adjust the emitters as needed to ensure even distribution.
Installing a Misting System
Materials Needed:
- Misting nozzles
- Tubing
- Timer (for automatic operation)
- Water filter
- Pressure regulator
Installation Steps:
- Install Misting Nozzles: Attach misting nozzles to the tubing at intervals that will ensure coverage of all plants.
- Connect to Water Source: Like the drip system, connect your tubing to a water source with a filter and pressure regulator installed.
- Set Up a Timer: For automated misting, set up a timer that activates the system at intervals suitable for your climate and plant types.
- Secure and Test: Secure the tubing and nozzles in place. Test the system to ensure the mist is evenly distributed and adjust as necessary.
Maintenance Tips
- Regularly Check for Clogs: Inspect emitters and nozzles for clogging and clean or replace them as needed.
- Monitor Water Flow: Make sure the system maintains a consistent flow and pressure to ensure optimal watering.
- Adjust According to Season: Change the watering schedule based on seasonal weather changes to meet plant needs without wasting water.
Implementing an integrated watering system in your greenhouse not only simplifies the care of your plants but also enhances their growth by providing consistent, adequate hydration. Whether you choose a drip system or misting setup, the key is to tailor the system to the specific needs of your garden environment.
The Wrap Up
In the world of DIY projects, there’s something truly magical about transforming old, forgotten windows into a flourishing garden haven. This step-by-step guide takes you on a journey of creativity and practicality, breaking down the process into eight easy-to-follow steps.
From gathering your materials and designing your greenhouse to adding that personal touch and finally watching your garden thrive, this guide brings a fulfilling and engaging experience. Give new life into old windows, creating a space where nature and craftsmanship harmoniously coexist.
With a bit of dedication and a splash of creativity, you’ll be amazed at what you can achieve in your very own greenhouse haven. Are you ready to set forth on this exciting adventure, where your hands will nurture life and your imagination will shape a thriving paradise?
Prepare to bear witness to the remarkable metamorphosis of old windows, as they evolve into the vibrant heart of your very own garden haven. It’s a journey filled with growth, inspiration, and a deeper connection to the natural world.