Landscaping with rocks can transform your outdoor space into a natural, rustic retreat. With a variety of shapes, sizes, and colors, rocks offer versatility, allowing homeowners to create stunning garden beds, walkways, or borders. This guide provides practical DIY tips for using rocks to enhance your home’s curb appeal while blending with nature.
Introduction to Landscaping with Rocks
Contents
Landscaping with rocks brings a timeless, natural feel to any outdoor space. By incorporating different types of stones, you can create a rustic, serene environment that complements your home’s natural surroundings. Whether designing garden pathways or decorative borders, Rock landscaping offers durability, versatility, and a low-maintenance solution to enhance your landscape’s overall appeal.
Types of Rocks for Landscaping
Selecting the correct kind of stone will make all the difference in how well your outdoor area looks when you landscape with rocks. There are countless ways to create a natural, rustic look from the range of rocks accessible. Every kind of rock, from big boulders to smooth pebbles, has a different use and visual and practical benefit.
Here are the most often used varieties of landscaping with rocks, together with ideas for how to include them most elegantly in your plans.
River Rocks
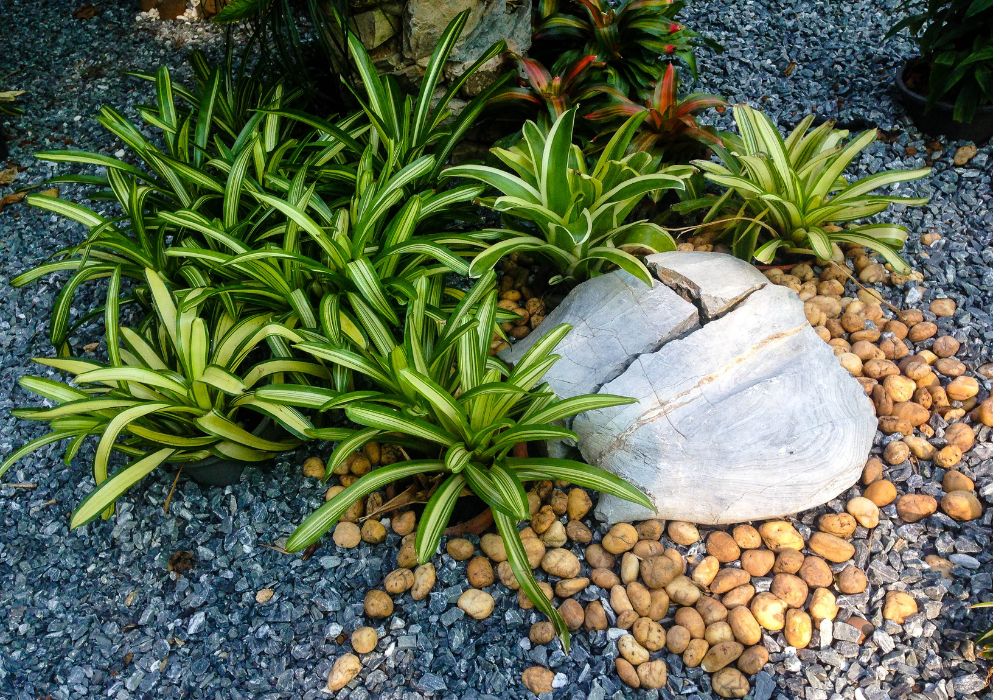
Smooth, rounded stones called river rocks have been naturally sculpted over time by water. Small pebbles to bigger stones, they range in size and color. For landscaping with rocks when you want a soft, polished appearance, these stones are ideal. Garden beds, around water features, or as ornamental borders, river rocks look great.
Their natural look fits perfectly with plants, which makes them a great choice for flowing, peaceful designs inspired by actual riverbeds. Their smooth texture makes them perfect for walking paths as well since they’re simple on bare feet.
Gravel
Because of its cost and adaptability, gravel is a common choice for landscaping with rocks. Made of little, crushed stones, gravel is a flexible material for many projects since it comes in different colors and sizes. Pathways, driveways, and other kinds of landscaping projects sometimes start with it.
In places where you wish for good drainage, gravel is especially helpful since it lets water pass through readily, so preventing waterlogging. Using edging materials will help you to keep the stones in place and preserve a neat, orderly appearance when layering gravel in your landscape.
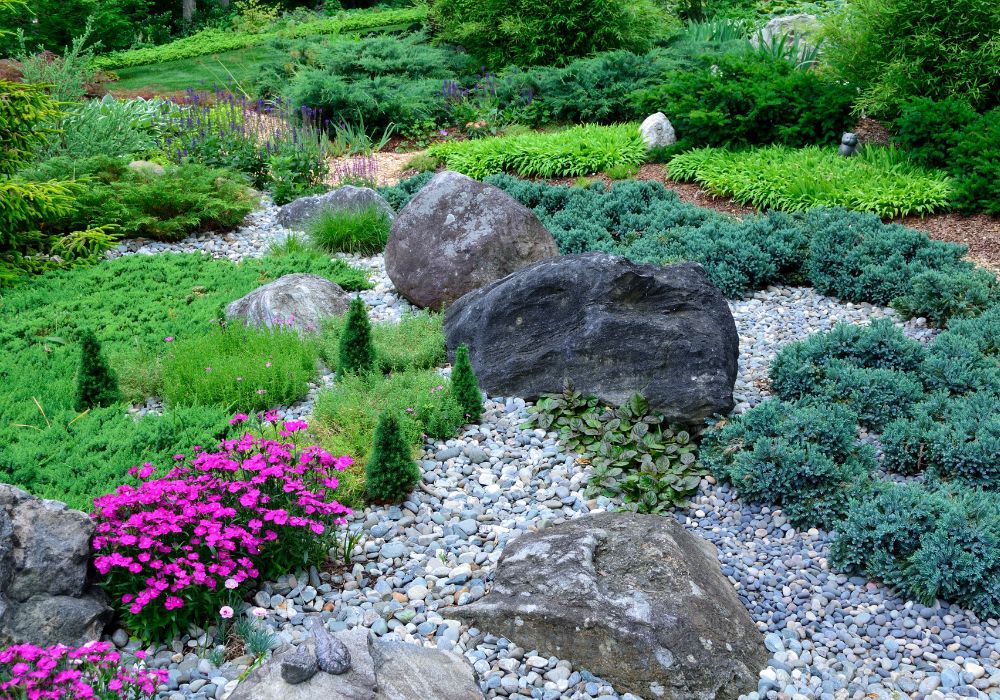
Boulders
If you’re aiming for a bold, dramatic effect in your landscape, boulders are an excellent choice. These large, heavy rocks can serve as focal points in your design, adding height and texture. Boulders are often used to create natural seating areas, build retaining walls, or enhance the look of large, open spaces.
When landscaping with rocks, using boulders adds a sense of permanence and stability to your outdoor space. They can also be paired with smaller stones or plants to soften their imposing appearance and create a more balanced look. Keep in mind that placing boulders typically requires professional help due to their size and weight.
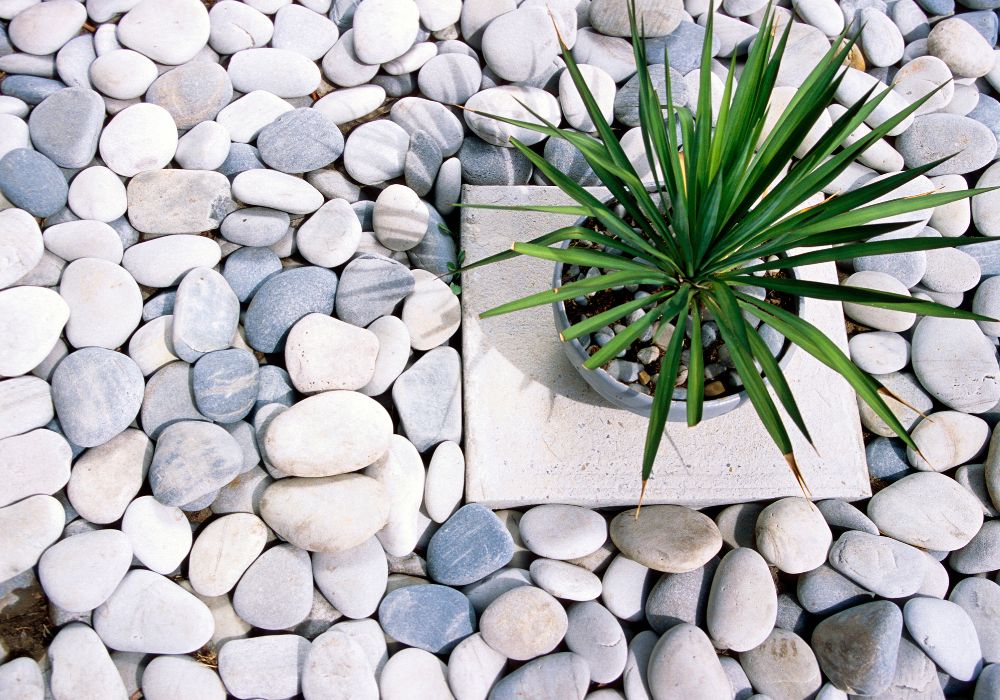
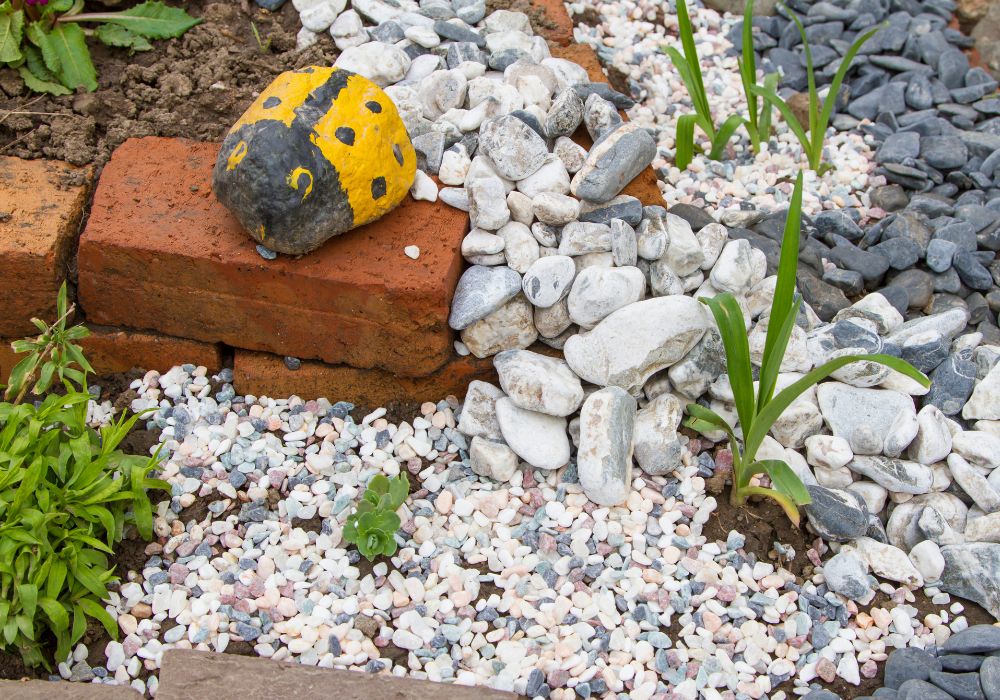
Pebbles
Pebbles are small, smooth rocks that are perfect for adding texture to your landscape without overwhelming the space. They come in various colors and can be used as decorative accents in garden beds, around potted plants, or even in water features.
Pebbles are also commonly used in zen gardens or as a ground cover in small spaces where larger rocks would seem too bulky. Pebbles can help you achieve a cohesive, polished look without much effort when landscaping with rocks on a smaller scale. They also work well for adding a subtle contrast in areas with more structured designs.
Crushed Stone
These are larger rocks broken down into smaller, angular pieces. Crushed stone is a robust choice for building driveways, and walkways, or as a base layer for other rock features. It looks more rugged than gravel, which has a rounded form because its edges are sharper.
Due to the size of each piece, they create better drainage for your outdoor area. Though it’s frequently used in more modern or industrial landscaping designs, it can also be combined with softer elements like plants or smaller stones to create a balanced appearance.
Lava Rock
Lava rock is a porous, lightweight stone that comes in rich, earthy tones like red, black, and brown. It’s ideal for including a striking, strong accent to your scene while preserving a natural appearance.
Because lava rock can control soil temperature and hold moisture, it is frequently used as mulch in garden beds. Its unique look distinguishes it, and lava rock can give your outdoor area an exotic, desert-inspired feel when used in landscaping with rocks. Given its low maintenance and durability, it’s also a great long-term choice for your garden.
Selecting the kind of rocks that best fit your project will help you to create an amazing and useful landscape. Landscaping with rocks lets you combine durability with natural beauty so that your outdoor area stays appealing and low-maintenance for many years to come.
Planning Your Rock Landscaping Project
Planning your rock landscaping project is a crucial step in ensuring your outdoor space looks cohesive and functions as intended. Whether you’re aiming for a rustic garden or a modern patio, planning properly can save you effort and money in the long run. A well-thought-out plan will allow you to make the most of your space and help you avoid common mistakes when landscaping with rocks.
Here’s how to get started.
Assessing Your Outdoor Space
Before diving into your rock landscaping project, you must assess your outdoor space. Start by taking measurements of the area you plan to transform. This will give you a clearer idea of how much material you’ll need. Pay attention to the slope and drainage of your yard as well.
Landscaping with rocks can improve drainage, but placing them in the wrong areas could cause water pooling or soil erosion. You’ll also want to consider how much sunlight the area receives, as this can impact the types of plants or additional features you want to incorporate with your rocks.
Take note of any existing elements in your yard, such as trees, patios, or walkways. This will help you determine how your rock landscaping can complement or enhance these features. It’s important to think about how the rocks will fit into the overall flow of your space, ensuring that they don’t feel out of place.
Creating a Design
After evaluating your area, it’s time to create a design for your rock landscaping. First, map out your yard roughly and mark the main places you wish to feature rocks. This might call for paths, garden beds, or water features. Remember that varied kinds of rocks have different uses. While smaller stones like gravel and pebbles are more suited for ground cover or paths, larger boulders are great focal points.
Consider the general visual you wish to attain as you design. Landscaping with rocks provides flexibility so that you may design everything from a sleek, modern look to a natural, rustic one. Think through how the rocks would interact with water features, vegetation, or any outside furniture. For a vivid garden, for instance, you might wish to surround a pond with rocks as a decorative border or as a background.
Budgeting and Materials
Although using rocks in landscaping can be a reasonably affordable approach to improving your outdoor area, you must first create a budget before beginning any project. The type, size, and amount required will affect the price of rocks; hence, an estimate of the material costs will assist you in budgeting appropriately. Factor those into your budget as you might also require tools, edging, and weed barriers.
Buying rocks is a good idea to do so slightly more than you would need. Having extra supplies guarantees that, should you run short, you won’t have to make an additional trip to the store and allows flexibility in your design. Additionally useful for next landscaping projects are the extra rocks.
Preparing the Area
Before laying down any rocks, you need to properly prepare the area. This involves clearing the space of any grass, weeds, or debris. For long-term success in landscaping with rocks, consider installing a weed barrier. This will help prevent weeds from growing between the rocks and maintain a clean, polished look over time.
If you’re creating pathways or borders, you may also need to dig out a shallow trench or clear the soil to provide a stable base for the rocks. In some cases, adding a layer of sand or gravel underneath larger stones will ensure they stay in place and don’t shift over time. Proper preparation is key to the longevity and appearance of your rock landscape.
Finalizing Your Plan
Once you’ve completed your assessment, design, and budgeting, you’ll have a solid plan for landscaping with rocks. Before moving forward, double-check your measurements and make sure you have all the necessary materials. By taking the time to plan carefully, you’ll set yourself up for a successful DIY project that will enhance the beauty and functionality of your outdoor space for years to come.
Landscaping with rocks allows you to create a durable and visually stunning landscape. With proper planning, you can transform your yard into a beautiful, low-maintenance retreat that reflects your personal style.
Enhancing with Plants and Water Features
Enhancing your landscape with plants and water features can take your rock design to the next level. By combining natural elements like greenery and flowing water with the texture and structure of rocks, you create a dynamic outdoor space that feels both calming and visually appealing. Landscaping with rocks provides a sturdy foundation, while plants and water features bring life and movement to your design.
Here’s how to successfully incorporate them into your rock landscaping project.
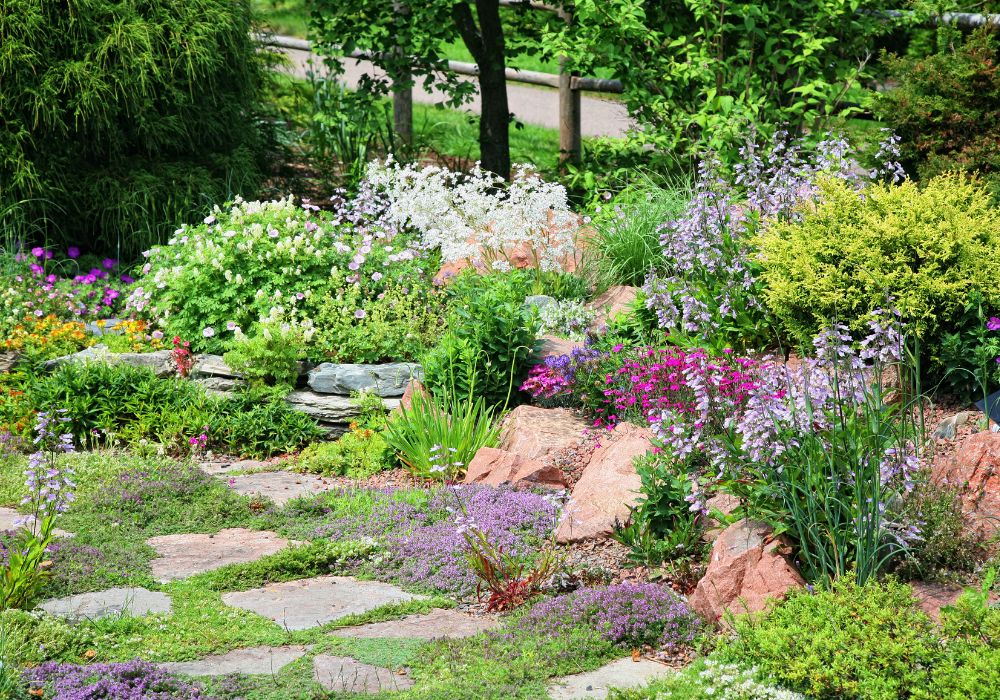
Choosing the Right Plants
When selecting plants to complement your rock landscape, consider those that thrive in rocky environments and require little maintenance. Succulents, ornamental grasses, and native plants are excellent choices, as they blend seamlessly with the natural look of rocks and don’t require much water. These plants are ideal for dry, arid climates where traditional garden plants may struggle.
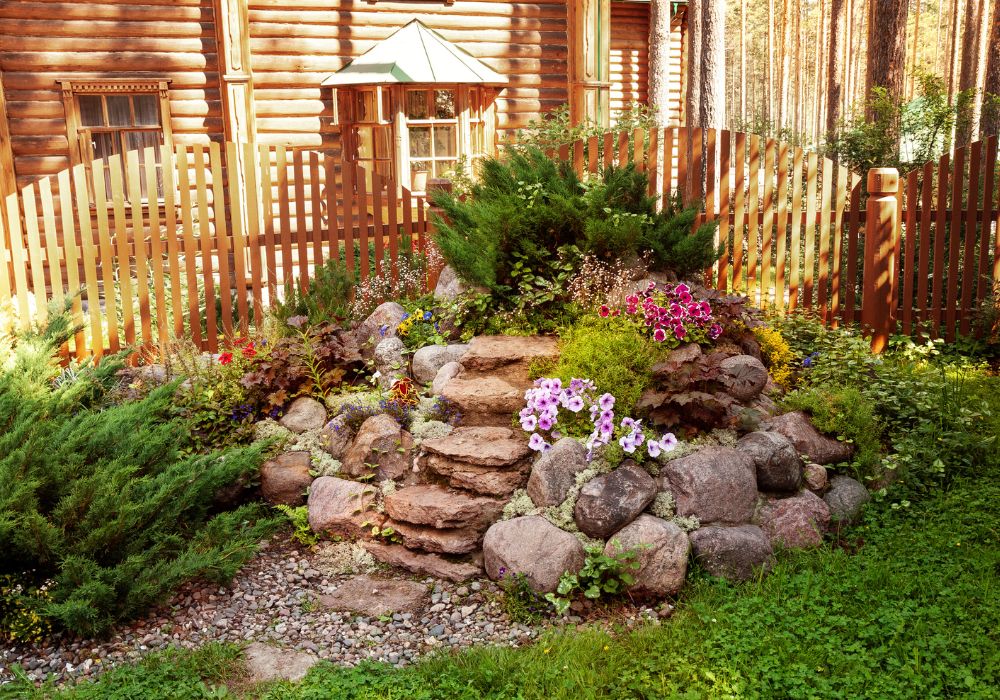
For a more lush look, you can also incorporate flowering perennials like lavender, daylilies, or sedum. These plants not only add color and contrast to your rock landscape but also attract pollinators like bees and butterflies, bringing more life to your outdoor space. When landscaping with rocks, be mindful of the plant placement. Larger rocks can serve as backdrops for taller plants, while smaller stones and gravel can highlight low-growing ground cover.
Adding Water Features
Water features can dramatically enhance the aesthetic of your rock landscape, adding both visual and auditory appeal. A small pond, bubbling fountain, or cascading waterfall can create a peaceful atmosphere that pairs perfectly with the natural beauty of rocks.
When designing a water feature for landscaping with rocks, consider using rocks to line the edges of ponds or streams, or as part of the fountain structure itself. Natural stones like river rocks or boulders work well for creating a rustic, organic look around water features.

Additionally, the sound of water flowing over rocks can create a soothing environment, making your yard feel like a tranquil retreat. Keep in mind that water features require some maintenance, such as cleaning filters and ensuring proper water circulation, but they’re well worth the effort for the ambiance they provide.
Creating Balance Between Elements
The key to successfully landscaping with rocks, plants, and water features is balance. Avoid overcrowding your space with too many elements; instead, aim for a harmonious blend of textures and heights. Use rocks to frame water features and create pathways, while plants can soften the hard edges of the stones. By carefully combining these elements, you’ll create a stunning, natural landscape that feels both cohesive and inviting.
Maintenance Tips for Rock Landscaping
Maintaining rock landscaping is essential to keeping it looking its best over time. While landscaping with rocks is relatively low-maintenance compared to other landscape designs, some care is still needed to ensure your outdoor space stays clean, organized, and weed-free. Regular upkeep will help preserve your rock features’ natural beauty and functionality.
Here are some practical tips to maintain your rock landscape.
Preventing Weed Growth
Weed control is one of the primary concerns when it comes to landscaping with rocks. While rocks are great for reducing the spread of weeds, they aren’t completely weed-proof. Over time, dirt can accumulate between the rocks, allowing weeds to take root. To prevent this, it’s essential to install a high-quality weed barrier or landscape fabric beneath the rocks during installation. This layer blocks sunlight and prevents weed seeds from germinating.
If weeds do manage to grow through, they can be easily removed by hand, or you can use a natural weed killer that won’t harm the surrounding plants or soil. Regularly inspecting your rock landscaping and removing weeds as soon as they appear will prevent them from becoming a larger problem.
Cleaning and Refreshing Rocks
Over time, dirt, leaves, and debris can collect on top of your rocks, dulling their appearance. For larger rocks and boulders, cleaning them with a garden hose or pressure washer can remove dirt and restore their natural color. For smaller stones like gravel and pebbles, raking can help remove surface debris and redistribute the rocks for an even appearance.
If your landscaping with rocks includes pathways or gravel areas, you might notice the rocks shifting or settling unevenly. Refresh these areas by periodically adding more gravel or small stones to fill in gaps. This will keep your landscape looking full and well-maintained. Additionally, raking the rocks helps keep the surface even and prevents uneven wear on heavily trafficked areas.

Managing Erosion and Drainage
Landscaping with rocks can help manage water flow and erosion in your yard, but improper placement or lack of maintenance can lead to problems. If your landscape is on a slope or an area prone to heavy rain, you might notice rocks shifting or soil erosion over time. To prevent this, ensure your rocks are placed securely and consider adding edging materials like stone borders or timber to hold them in place.
For areas with heavy water flow, larger rocks like boulders can be used to stabilize the soil and prevent erosion. You may also want to create channels or dry riverbeds using gravel or river rocks to direct water away from problem areas. Regularly check these features after rain to ensure they function as intended and adjust as needed.
Plant Care and Pruning
If your rock landscape includes plants, regular care is necessary to maintain their health and prevent them from overtaking the rocks. Landscaping with rocks often pairs well with low-maintenance plants like succulents, ornamental grasses, and native plants, but even these require occasional pruning and watering. Trim back overgrown plants to prevent them from covering rocks and obscuring your design.
In dry climates, consider adding mulch around the base of your plants to help retain moisture, especially in areas where you’ve used smaller stones. This will not only help your plants thrive but also create a more polished look for your rock landscaping.
Seasonal Maintenance
Different seasons may bring unique challenges to your rock landscape. In the fall, leaves can accumulate on rocks, requiring regular raking or blowing to keep the area clean. In the winter, snow and ice can cause rocks to shift or become buried. Clear any snow buildup promptly to maintain visibility and prevent damage to the underlying fabric or base layers.
By following these maintenance tips, your landscaping with rocks will remain a beautiful and functional part of your outdoor space. Regular care ensures that your landscape stays clean, organized, and resistant to weeds and erosion, preserving its natural appeal for years to come.
Conclusion
Landscaping with rocks offers a natural and rustic way to enhance your outdoor space with minimal maintenance. With proper planning, rock selection, and regular care, your rock landscape will remain both functional and visually appealing for years. This timeless design choice adds beauty and durability to any garden or yard.
For more ways to improve your outdoor space, check out our guide on tropical garden design!