Last Updated on May 23, 2024 by teamobn
Having a beautiful garden is a dream for most homeowners. It’s a great place to spend time in, enjoying the outdoors, and basking in the beauty of nature. Fortunately, beautifying one’s garden does not simply involve plants. There are a lot of things that you can do to enhance its aesthetics.
Mosaic Garden Path Basics
Contents
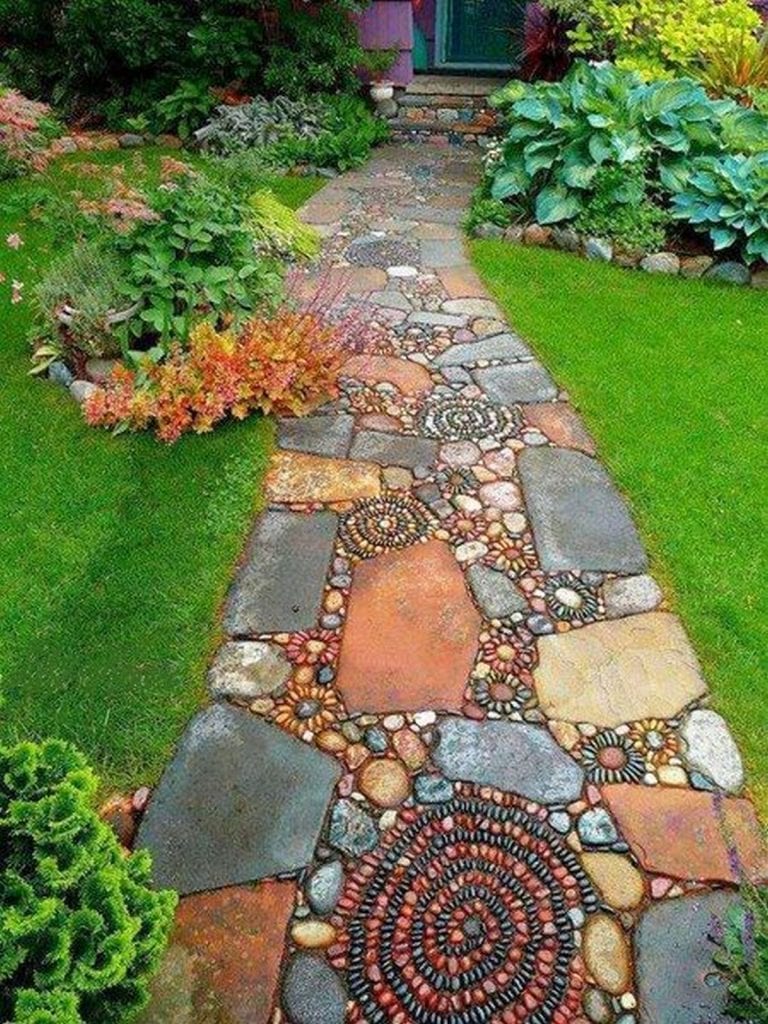
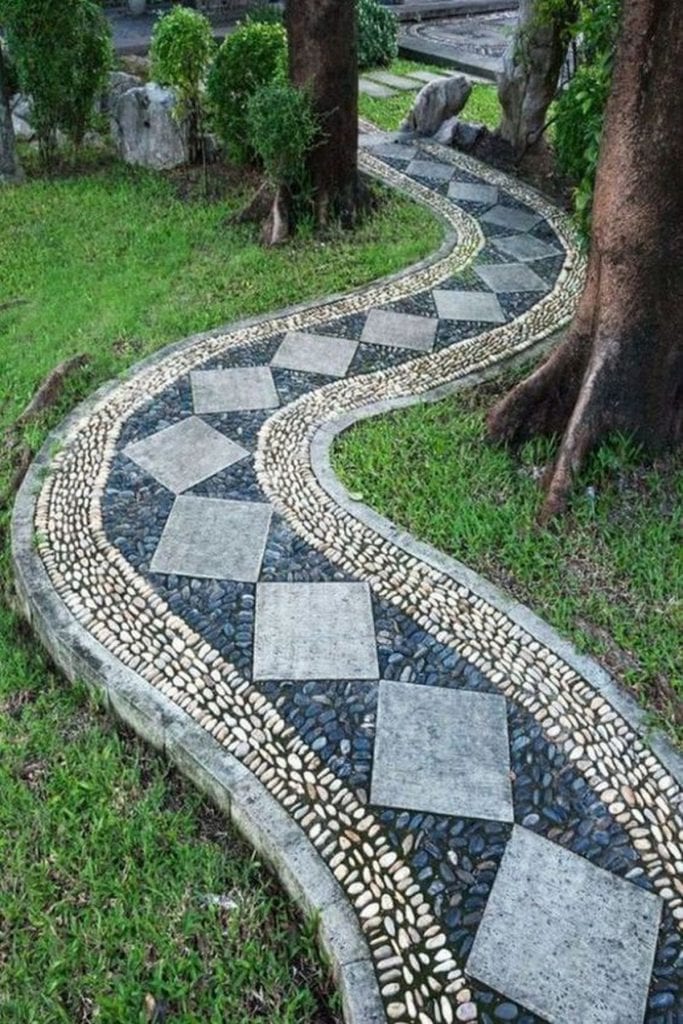
One of the most popular garden trends nowadays is mosaic pathways. You can use stones or broken tiles, decorative tiles, or bricks. When it comes to this project, your imagination is the limit. Unleash your creative spirit, embark on this project, and satisfaction is guaranteed.
If you think that your garden requires a much-needed facelift, consider making a mosaic pathway. This will give your garden added charm and an added focal point.
So what do you think? Is this something that you’re willing to do? Challenge yourself and you’ll find out your effort will be so worth it.
Click on any image to start the lightbox display. Use your Esc key to close the lightbox.


Materials Selection for Mosaic Paths
Creating a mosaic garden path adds a personal touch and artistic flair to your outdoor spaces. The materials you pick are key to ensuring your path is as durable as it is striking.
Here’s a breakdown of the best options to consider for a mosaic garden path that’s as unique as your garden.
Ceramic Tiles
Ceramic tiles are a go-to for mosaic garden paths. These tiles are durable and come in different designs and styles. You can easily mix and match ceramic materials to create a mosaic garden path of your liking. When picking ceramic tiles, try mixing different textures and colors to make your path pop.
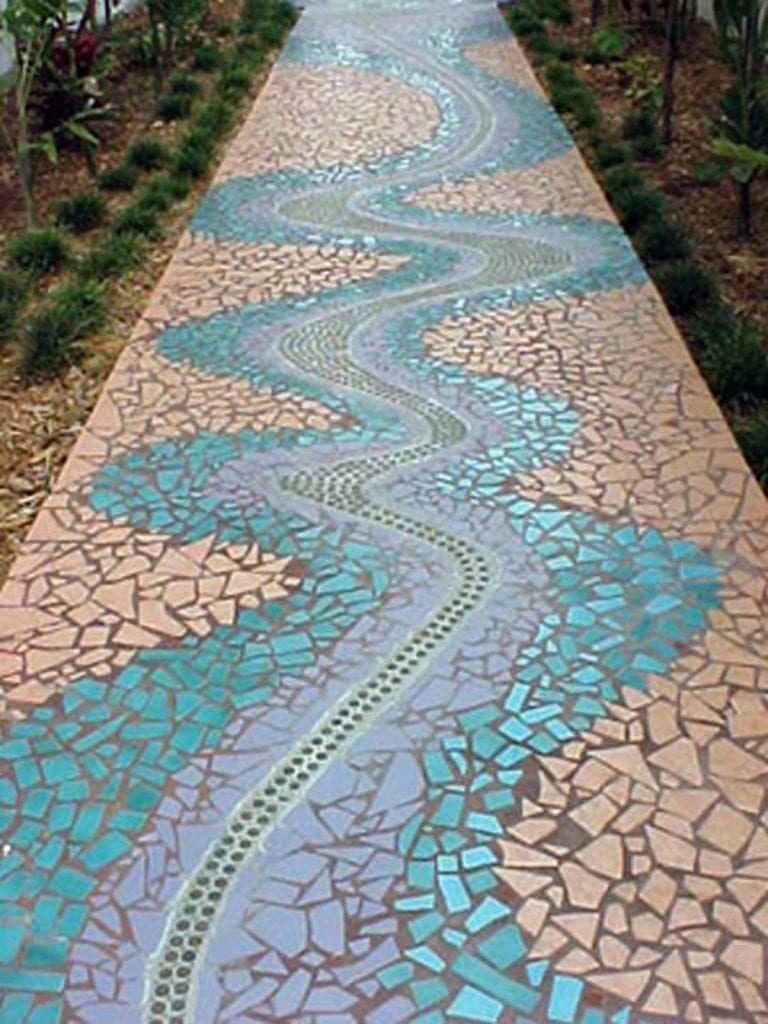
Glass Tiles
Glass tiles are a great option if you want to give your yard some glitter. They can draw attention to your garden walk by catching and reflecting light. You can find these in different colors and opacity. Just keep in mind that they might get slick when wet, so be careful where you set them.
Natural Stones
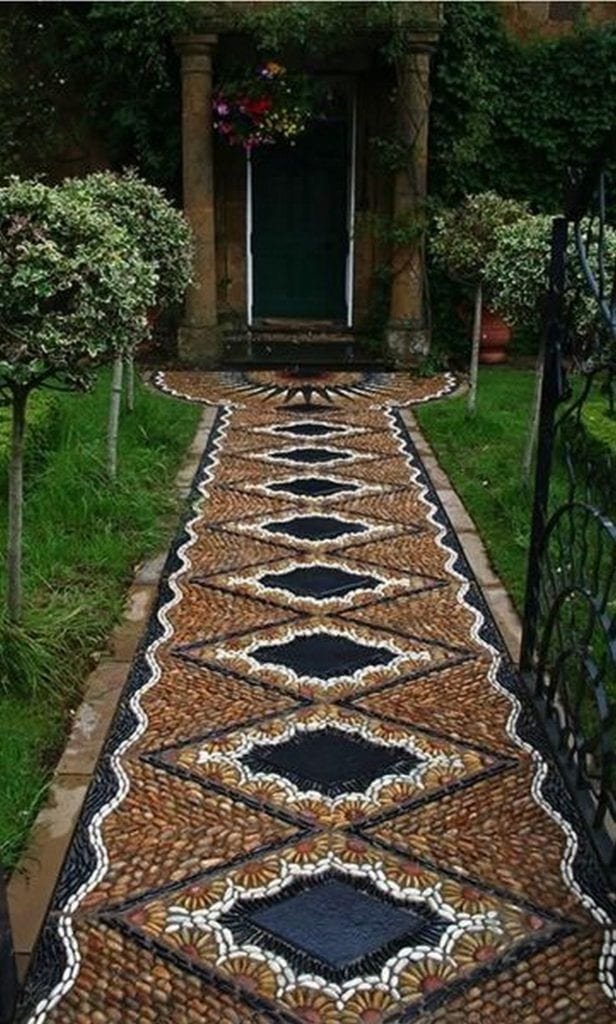
Using natural stones like pebbles, slate, or marble gives your path a more organic, grounded feel. These materials are tough and blend beautifully with outdoor surroundings. Each stone has its own texture and color, adding a unique element to your mosaic garden path.
Recycled Materials
For those looking to be eco-friendly, recycled materials offer a sustainable option. Old china, bits of stained glass, or leftover tiles can all be repurposed into something beautiful. Using recycled materials not only saves them from the landfill but also adds a story and character to your garden path.
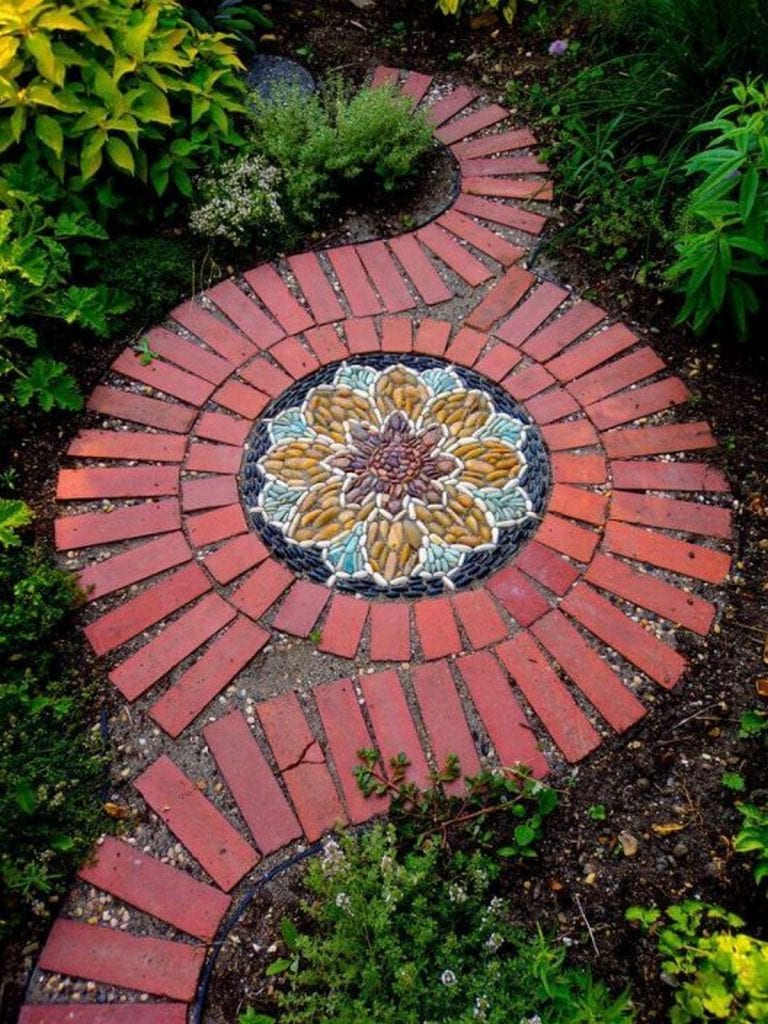
Bricks
Bricks are a robust choice that can be used whole or broken into pieces for a more traditional or abstract design. Their deep red and brown hues contrast nicely with green garden spaces, making them ideal for creating a path that’s both functional and attractive.
Choosing the perfect material for your mosaic garden path means balancing aesthetics with practical considerations like climate and foot traffic. Feel free to mix materials to match your style and the personality of your garden. Each option offers something special, so have fun and let your garden’s character shine through.
Design and Planning Your Mosaic Path
Designing your mosaic garden path is an exciting process that lets you express your creativity while enhancing your outdoor space. Proper planning ensures that your path not only looks fantastic but also integrates well with the rest of your garden.
Here’s how to start designing and planning your mosaic garden path effectively.
Conceptualizing Your Design
Begin with a clear vision. What mood or theme do you want to convey with your mosaic garden path? Whether you’re aiming for a vibrant, playful effect or a more subdued, elegant pathway, your design should reflect the overall tone of your garden. Sketch out a few designs or use design software to visualize your ideas. Consider elements like color schemes, patterns, and the shapes you find appealing.
Choosing a Layout
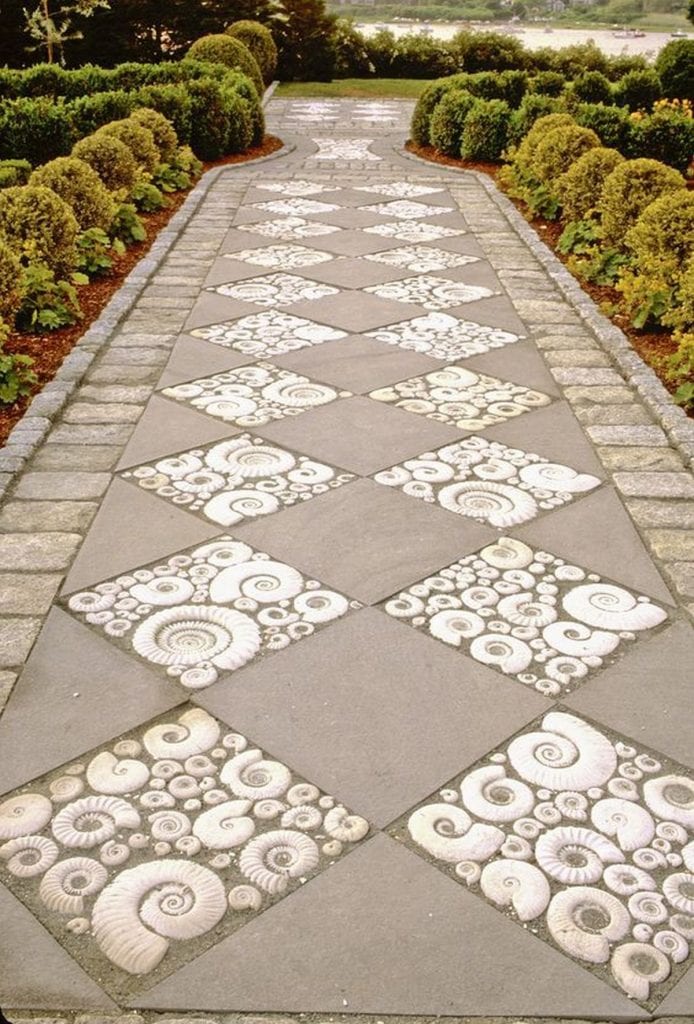
The layout of your mosaic garden path should complement the existing landscape. Decide whether you want a straight, direct path or a more whimsical, curving route. A straight path suits formal gardens, while a curving path can add a sense of mystery and exploration to your space. Measure the area where you plan to lay your path and scale your design accordingly.
Integrating Functional Elements
Your mosaic garden path isn’t just a decorative element—it needs to be functional as well. Consider the width of the path; it should be wide enough to comfortably walk on, and even accommodate two people side by side if it’s a main pathway. Think about the practicalities of your design. For example, if you’re using smaller tiles or intricate patterns, remember that these require more time and precision to install.
Selecting a Focal Point
Choose a focal point for your mosaic design. This could be a particular pattern, a unique color contrast, or a central motif that draws the eye. Placing a focal point at either the start or the end of your path can create a compelling invitation to enter and explore the garden.
Mapping Out the Installation
Before you start laying tiles, it’s crucial to plan the installation process. This involves preparing the base where your path will lie. A solid, well-prepared base is essential to prevent your tiles from shifting or cracking over time. Outline your path with string or garden hoses to visualize the space physically, and adjust your plan as needed.
Incorporating Borders and Edging
Consider adding borders or edging to your mosaic garden path to define it clearly against the rest of your garden. This can be done using contrasting materials like bricks, stones, or even additional tiles that complement the main design. Borders not only improve the aesthetics but also help in maintaining the integrity of your path by keeping the tiles in place.
Adjusting for Scale and Proportion
Pay attention to the scale and proportion of the tiles or pieces used in your mosaic. Larger pieces can be used effectively in bigger, open areas, while smaller pieces are ideal for intricate designs and smaller paths. Ensuring the pieces are proportional to the size of your path prevents the design from looking overwhelmed or sparse.
Lighting Considerations
Think about how lighting will affect your mosaic garden path. Natural lighting can enhance the colors and textures of your path, but adding artificial lighting like solar or LED garden lights can elevate the path’s beauty and functionality during the evening. Position lights strategically to highlight key features of your mosaic.
Seasonal Adaptability
Plan your mosaic garden path with the changing seasons in mind. Choose materials and colors that look good year-round and consider how elements like fallen leaves or snow might affect the appearance and safety of the path. Using textured tiles can help prevent slipping during wet or icy conditions.
Drainage Planning
Ensure proper drainage along your mosaic garden path to prevent water accumulation that can damage the mosaic tiles over time. Sloping the path slightly or incorporating a drainage system beside or underneath the path can help manage water runoff effectively.
Detailing with Grout
The color and type of grout you choose can significantly impact the final look of your mosaic garden path. Select a grout color that either complements or contrasts with your tiles to enhance the design. Also, ensure the grout is suitable for outdoor use to withstand weather conditions.
Future Expansion Possibilities
When designing your mosaic garden path, consider how it might be extended or altered in the future. Leave room for expansion or additional artistic elements that can be added as your garden grows or your tastes change.
Designing and planning your mosaic garden path is a blend of art and technique. Take your time to consider different elements and how they interact. With thoughtful planning, your mosaic garden path will not only be a beautiful addition to your garden but also a durable, functional pathway that enhances the overall aesthetics of your outdoor environment.
Installation Techniques for Your Mosaic Garden Path
Installing a mosaic garden path is a meticulous process that combines artistry with precision. Proper installation ensures that the path is durable, visually appealing, and seamlessly integrated into your garden. Follow these detailed steps and techniques to correctly install your mosaic garden path and enjoy its beauty for years to come.
Preparing the Base
The foundation of your mosaic garden path is critical for its longevity and stability. Start by clearing the area of debris, weeds, and any old paving materials. Level the ground and compact the soil to prevent settling or shifting. Lay a base of crushed stone or gravel, about 3-4 inches deep, and compact it firmly. Over this, add a layer of sand to provide a smooth, flat surface to work on.
Laying the Tiles
- Dry Layout: Before permanently setting the tiles, do a dry layout to finalize your design and ensure everything fits as planned.
- Applying Adhesive: If using adhesive (for concrete bases), apply it evenly with a notched trowel. For sand bases, you can place the tiles directly.
- Setting Tiles: Begin laying your tiles from the center or from one end of the path, pressing each piece firmly into place. Use spacers if you want consistent gaps for grout.
- Cutting Tiles: You may need to cut tiles to fit the edges or around curves. A tile cutter or a wet saw can be used for precise cuts.
Applying the Grout
Once all tiles are set and the adhesive has cured (if used), it’s time to grout the path to lock the tiles in place and prevent movement.
- Mixing Grout: Choose a grout suitable for outdoor use and mix it according to the manufacturer’s instructions.
- Filling Joints: Use a grout float to press grout into the spaces between tiles. Ensure that all joints are fully filled.
- Cleaning Surface: Wipe off excess grout with a damp sponge. Be sure to clean the surface thoroughly to avoid leaving a haze on the tiles.
Sealing the Path
Sealing your mosaic garden path will protect it from weather elements and make it easier to clean.
- Choosing a Sealant: Select a sealant appropriate for the types of tiles you used. Some sealants enhance color while others provide a matte finish.
- Applying Sealant: Apply the sealant with a brush or roller, covering the entire path, including the grout lines. Follow the manufacturer’s guidelines for drying time.
Curing the Path
Allow your newly installed mosaic garden path to cure for the time recommended by the grout and adhesive manufacturers. This usually takes several days. Avoid walking on the path during this period to ensure the materials set properly.
Using these installation techniques ensures your mosaic garden path is a beautiful addition to your garden and a durable and long-lasting piece of functional art.
Conclusion
Creative mosaic garden paths provide a special way to add your personal touch to your outdoor space with artistic flair and long-lasting design. Every step in the process, from choosing materials to the final installation, allows for customization to complement any garden style. With proper planning and techniques, your mosaic garden path will become a captivating feature that enhances the beauty and functionality of your garden for years to come.