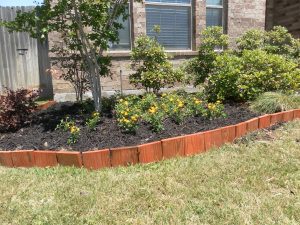
A wooden garden obelisk would look good in a garden as it provides a sharp contrast to its natural surroundings. The geometric nature of an obelisk will add a beautiful touch. Its crisp, structured lines and edges will allow the tower to stand out.
This is a simple project, actually. However, there are angled cuts that are quite tricky for those with no basic woodworking skills. If you’re quite unsure of how to tackle a DIY garden obelisk project, first assess your carpentry skills. When in doubt, ask for help.
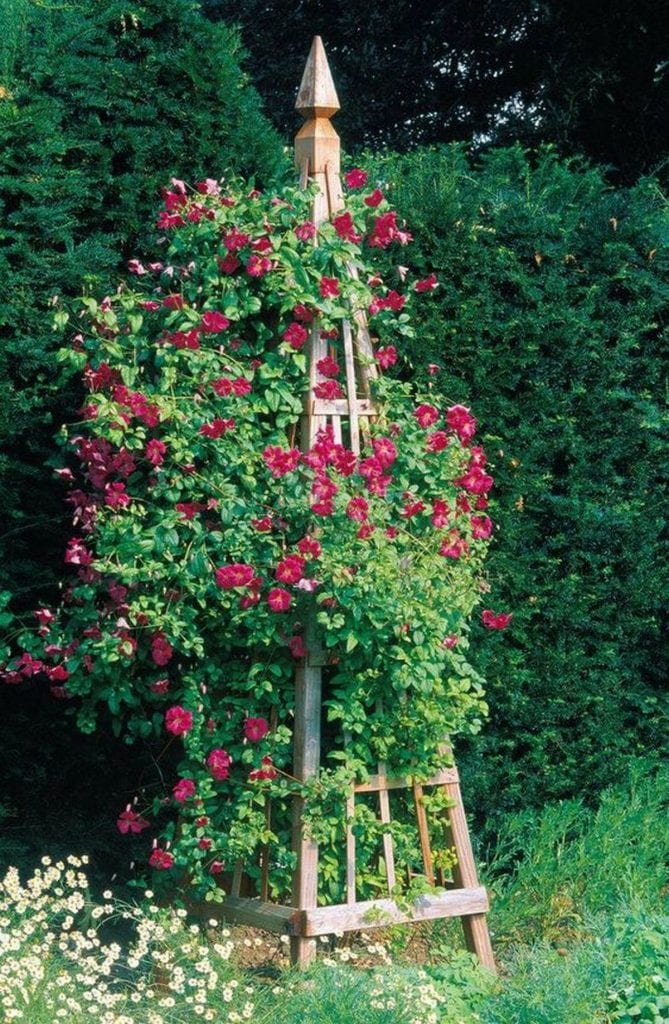
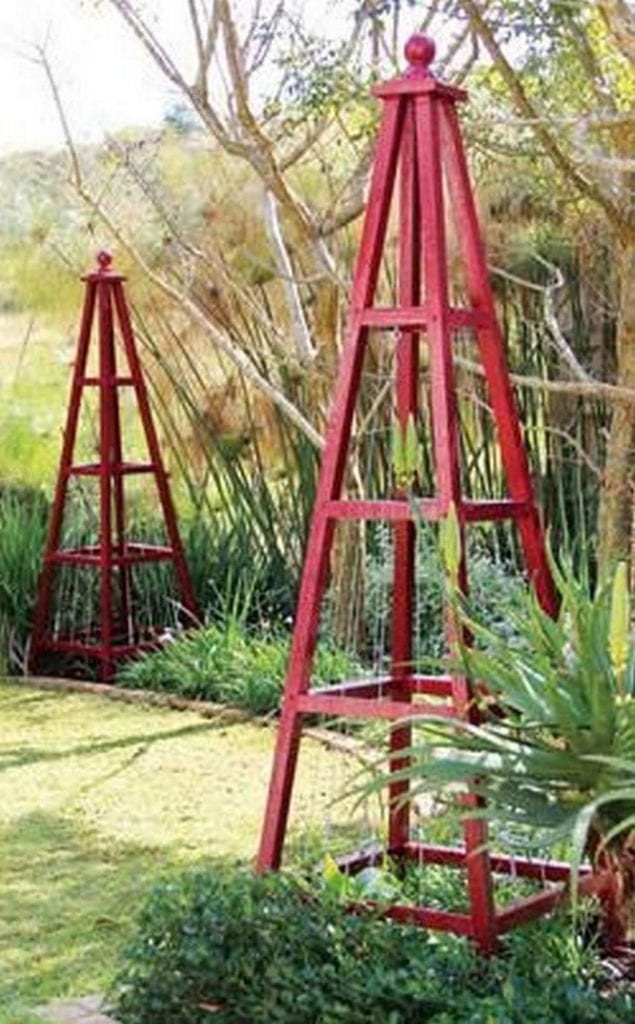
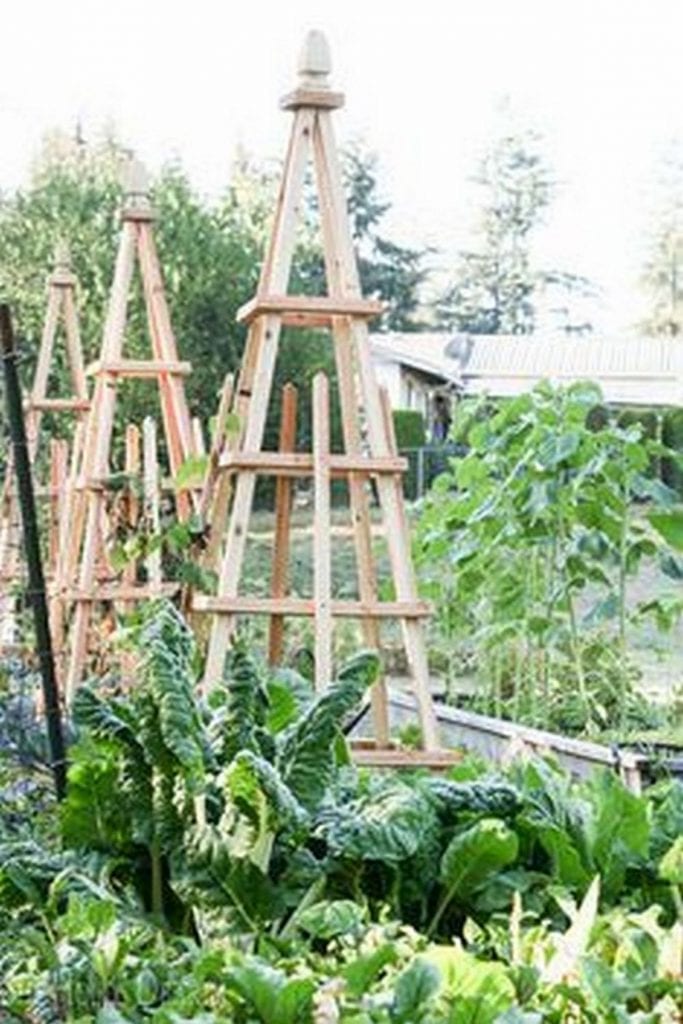
You can make several of these wooden garden obelisks and arrange them carefully in your garden. You can also paint them if you want. Once the vines have started to climb up your towers, they will create a stunning focal point.
Crafting Garden Magic: Your DIY Wooden Garden Obelisk Adventure!
Contents
Get ready to turn your garden into a botanical wonderland with the DIY wooden garden obelisk – the ultimate fusion of form and function! This towering structure not only adds a touch of elegance to your outdoor space but also provides vital support for your climbing plants. Buckle up and get ready for a journey as we unveil the five essentials for crafting a stunning wooden garden obelisk that’ll make your backyard the envy of the neighbourhood.
1. Plotting Perfection: Blueprint for Brilliance
Before you break out the tools, take a moment to map out your masterpiece. Consider the layout of your garden and choose a strategic spot for your obelisk to steal the show. Measure twice, cut once – ensure your design fits seamlessly into your outdoor oasis. Pro tip: Think about the plants you’ll be supporting and tailor your obelisk’s dimensions accordingly.
2. Timber Talk: The Wood That Wows
When it comes to your obelisk, quality lumber is non-negotiable. Opt for durable, weather-resistant options like cedar or redwood to withstand the test of time. Bonus points for sustainability – look for certified or reclaimed wood to minimize your environmental footprint. Pro tip: Select boards that are straight and free of knots for a professional finish that pops!
3. Tool Time: Equipping Your Workshop for Success
Time to gear up for some serious DIY action! Stock up on essential tools like a saw, drill, measuring tape, and level. Safety first – don’t forget your goggles and gloves! Pro tip: Consider investing in a sturdy workbench or sawhorse to make cutting and assembly a breeze. With the right tools in hand, you’re unstoppable!
4. Craftsmanship is Key: Building with Precision
With your materials and tools at the ready, it’s time to roll up your sleeves and get to work. Follow your design plans to cut your lumber with precision and care. Use wood glue and screws for added strength, creating a sturdy framework that can withstand the elements. Pro tip: Take your time and double-check your measurements – attention to detail is the secret sauce!
5. Finishing Flourish: Adding the Wow Factor
With the structure complete, it’s time to add those final touches that take your obelisk from ordinary to extraordinary. Sand down any rough edges for a smooth, professional finish, then apply a weatherproof sealant to protect your masterpiece from the elements. Feeling adventurous? Consider staining or painting your obelisk to match your garden’s aesthetic. Pro tip: Stand back and admire your handiwork – you’ve just crafted a garden centrepiece that’s sure to turn heads!
Congratulations, DIY aficionado – you’ve embarked on a journey to craft a stunning wooden garden obelisk! With careful planning, quality materials, and a dash of creativity, you’ve transformed your outdoor space into a paradise of greenery. Sit back, relax, and watch as your climbing plants reach new heights of beauty. Here’s to many happy years of garden greatness ahead
Materials:
- 1 – 4 x 4 fence post with finial, cut about 14″ long
- 4 – 8′ 2 x 2s for 93½” legs
- 1 – 8′ 2 x 4 for four 22″ spreaders
- 4 – 4′ pieces of ¼” x 1½” lath, perhaps rip-cut from a 2 x 4, for: four 17½” lower crosspieces, four 14″ middle crosspieces, and four 10½” upper crosspieces
- 4 – 7′ pieces of ¼” x 1″ lath, perhaps rip-cut from 5⁄4 decking, for four long verticals
- 8 – 5′ pieces of ¼” x 1″ lath for eight shorter verticals
- 1¼” and 2″ decking or stainless-steel screws
- Exterior wood glue/polyurethane glue
Tools:
- Electric drill with drill bits
- Miter saw
- Table saw
- Hammer
Click on any image to start the lightbox display. Use your Esc key to close the lightbox.


You can make your garden obelisk at home! Watch this video to learn how.
5 Essential DIY Wooden Garden Obelisk Designs!
Ready to sprinkle some DIY magic into your garden? Say hello to the DIY wooden garden obelisk – the ultimate way to elevate your outdoor space with style and flair! Whether you’re a seasoned craftsman or a DIY novice, crafting your wooden garden obelisk is a fun and rewarding project that adds charm and character to any garden setting.
Get ready to explore five essential designs that will take your garden from drab to fab in no time!
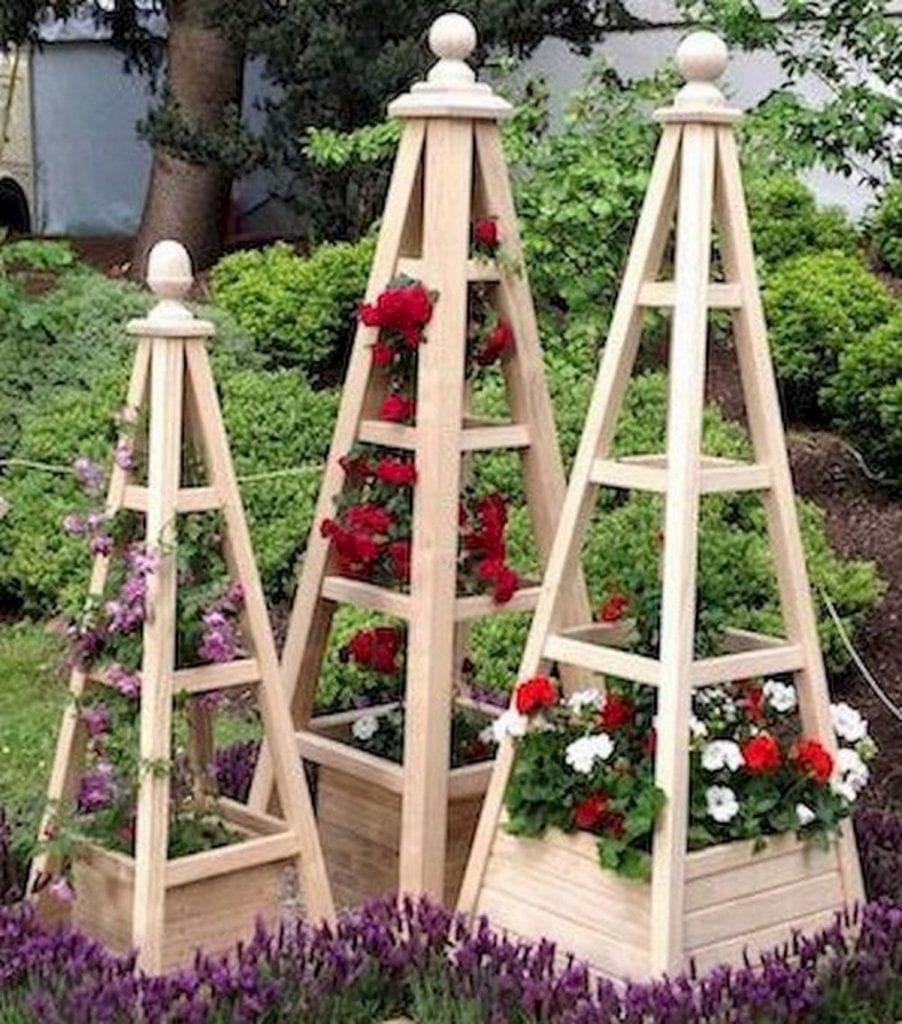
1. Timeless Elegance: The Classic Pyramid
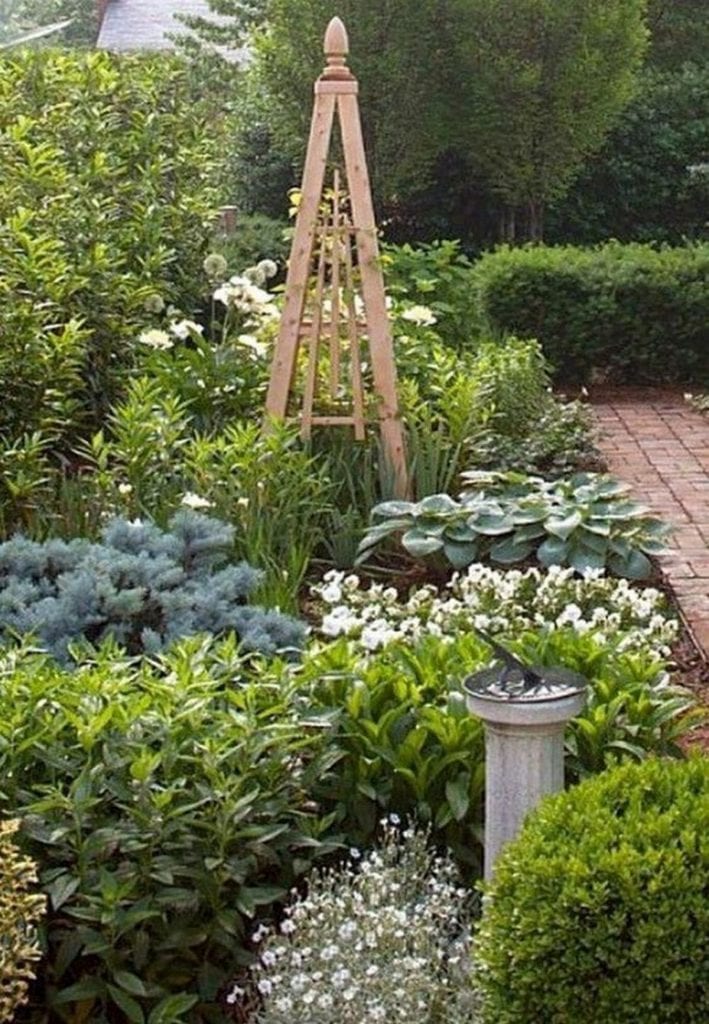
Step back in time with the timeless elegance of the classic pyramid design. Featuring clean lines and symmetrical proportions, this iconic obelisk adds a touch of sophistication to any garden landscape.
Crafted from sturdy timber and topped with a decorative finial, the pyramid obelisk offers both beauty and functionality, providing sturdy support for climbing plants while serving as a striking focal point in your garden.
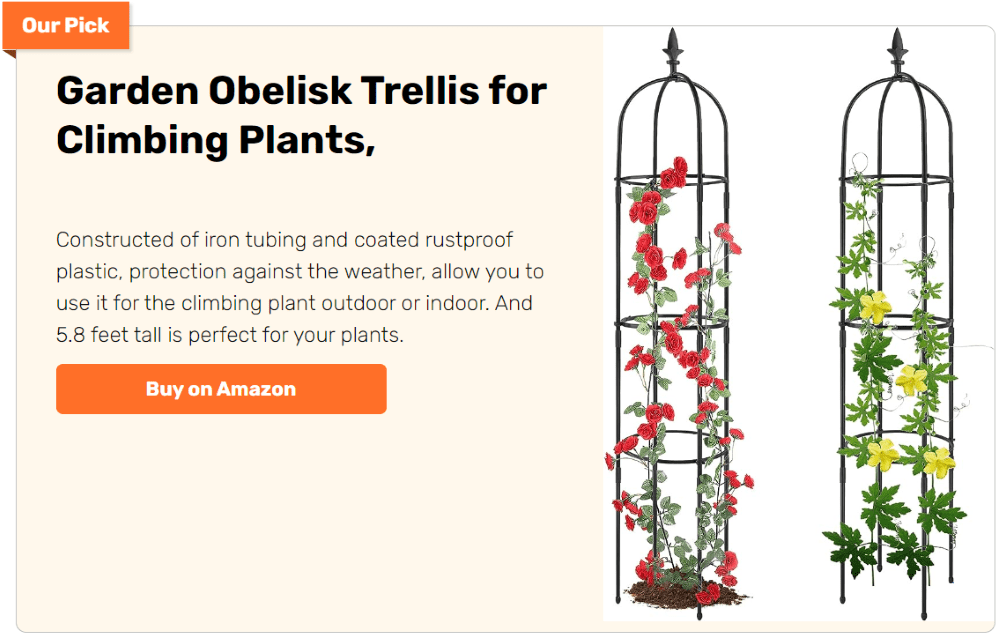
2. Contemporary Chic: The Modern Marvel
For those with a taste for modern design, the sleek and stylish modern obelisk is sure to impress. Characterized by clean lines and geometric shapes, this contemporary structure adds a touch of urban sophistication to your outdoor space.
Crafted from sleek timber or metal accents, the modern obelisk is perfect for complementing modern landscapes or adding a bold statement to traditional gardens.
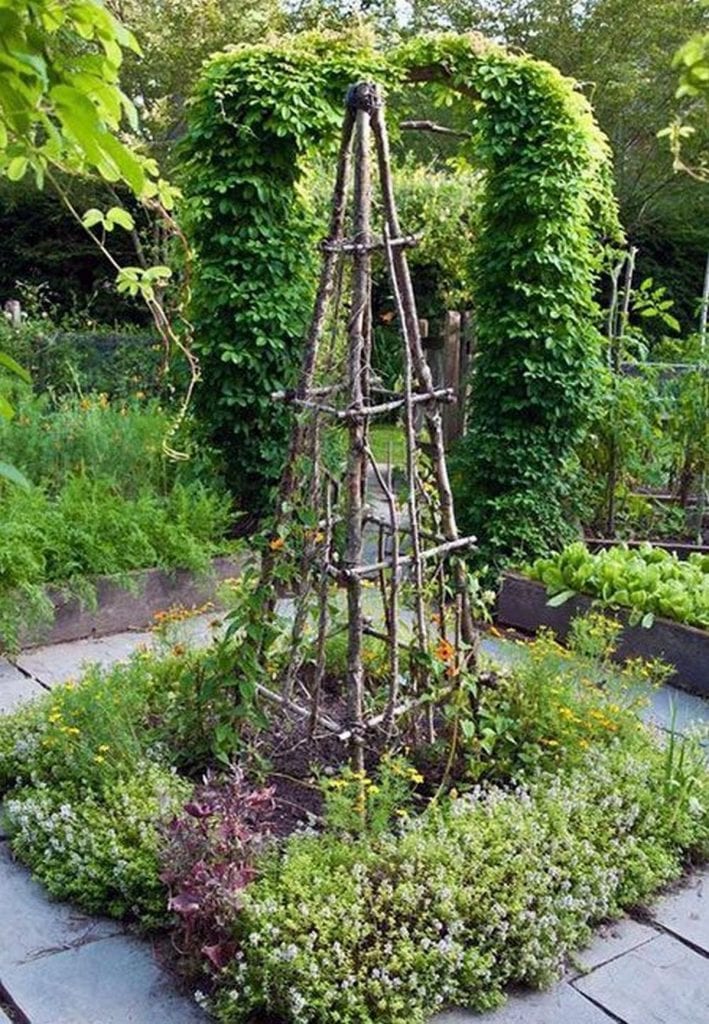
3. Rustic Charm: The Woodland Wonder
Bring a touch of rustic charm to your garden with the whimsical woodland obelisk. Crafted from weathered timber or reclaimed wood, this rustic beauty exudes warmth and character, adding a touch of country chic to your outdoor oasis.
Adorned with trailing vines or fairy lights, the woodland obelisk creates a magical focal point that invites you to escape into nature’s embrace.
4. Artistic Expression: The Creative Canvas
Unleash your inner artist with a custom-designed obelisk that showcases your unique personality and style. From intricate lattice patterns to whimsical shapes and sculptures, the artistic obelisk is a canvas for creative expression.
Whether you prefer floral motifs, abstract designs, or personalized monograms, the sky’s the limit when it comes to artistic obelisk designs. Let your creativity soar and transform your garden into an outdoor gallery of stunning masterpieces!
5. Multi-Functional Marvel: Beauty Meets Functionality
Why settle for the ordinary when you can have extraordinary? The multi-functional obelisk combines beauty and functionality in a single design, offering a versatile solution for your garden needs. Featuring built-in planter boxes, storage compartments, or bird feeders, this innovative structure maximizes space while adding visual interest to your garden.
Whether you use it to showcase your favourite blooms, grow herbs and vegetables, or attract feathered friends, the multi-functional obelisk is a game-changer for garden enthusiasts.
With an array of captivating designs to choose from, crafting your DIY wooden garden obelisk is a surefire way to add charm, character, and functionality to your outdoor space. Whether you prefer timeless elegance, contemporary chic, rustic charm, artistic expression, or multi-functional marvels, there’s a design to suit every taste and style.
So roll up your sleeves, grab your tools, and embark on a journey to transform your garden into a paradise of creativity and beauty.
5 Essential Precautions for DIY Wooden Garden Obelisk
Embarking on a do-it-yourself (DIY) project can be immensely rewarding, but safety should always be a top priority. In this guide, we’ll explore the essential precautions to take when constructing a wooden garden obelisk—a charming addition to any outdoor space.
From selecting the right materials to operating power tools safely, these precautions will help you create your masterpiece while keeping yourself out of harm’s way.
1. Material Selection
Before diving into your DIY project, ensure you’ve chosen the appropriate materials for your wooden garden obelisk. Opt for high-quality, untreated lumber that is free of knots and defects. Pressure-treated wood contains chemicals that can be harmful if ingested or inhaled, so it’s best to avoid it, especially in a garden setting where food may be grown nearby.
Additionally, consider the environmental conditions your obelisk will face, such as exposure to moisture and sunlight, and select materials that can withstand these factors for long-lasting durability.
3. Tool Safety
Working with power tools requires a keen awareness of safety protocols to prevent accidents and injuries. Before using any tools, familiarize yourself with their operation manuals and safety guidelines. Always wear appropriate personal protective equipment (PPE), including safety goggles, ear protection, and gloves, to shield yourself from flying debris and noise pollution.
Keep your work area clean and well-lit, and never operate power tools while fatigued or under the influence of alcohol or drugs. Remember, a moment of carelessness can lead to a lifetime of regret.
3. Precision Measurements
Accuracy is paramount when constructing a wooden garden obelisk, as even minor discrepancies can compromise its structural integrity. Take precise measurements and double-check your calculations before making any cuts or joining pieces together.
Use a combination square or a framing square to ensure that angles are square, and employ clamps to hold workpieces securely in place during assembly. When cutting lumber, position yourself safely away from the blade’s path and never reach over or behind a running saw. By taking the time to measure twice and cut once, you’ll avoid costly mistakes and achieve professional-looking results.
4. Ladder Safety
Assembling a tall wooden garden obelisk may require working at heights, necessitating the use of a ladder. Before climbing any ladder, inspect it for damage or defects, such as bent rungs or missing screws, and never exceed its maximum weight capacity. Place the ladder on a stable, level surface, and secure it to prevent slipping or tipping over.
Maintain three points of contact with the ladder at all times, such as two feet and one hand, and never overreach or stand on the top rung. If possible, have a spotter assist you when working at heights to ensure your safety.
5. Finishing Touches
Once your wooden garden obelisk is assembled, consider applying a protective finish to enhance its appearance and longevity. Choose a weather-resistant sealant or outdoor wood stain that is non-toxic and eco-friendly, especially if your obelisk will be located near plants or vegetables.
Follow the manufacturer’s instructions for proper application and allow adequate drying time before placing your obelisk in the garden. Regularly inspect and maintain your obelisk to address any signs of wear or damage promptly, ensuring it remains a beautiful and safe addition to your outdoor oasis.
By following these five essential precautions, you can embark on your DIY wooden garden obelisk project with confidence and peace of mind. Remember to prioritize safety at every step of the process, from material selection to finishing touches, and don’t hesitate to seek assistance or guidance if you encounter challenges along the way.
With careful planning and attention to detail, you’ll soon enjoy the fruits of your labour as you admire your handcrafted masterpiece in the tranquillity of your garden.
The Wrap Up
In conclusion, crafting your own DIY wooden garden obelisk is not only a fulfilling endeavour but also a practical and visually appealing addition to your outdoor space. By following the five essential steps outlined in this guide, you can successfully create a stunning focal point for your garden while providing support for climbing plants and enhancing the overall aesthetic appeal of your landscape.
First and foremost, gathering the necessary materials and tools is crucial to ensure a smooth and efficient construction process. From sturdy wooden posts to screws or nails and optional embellishments like wood stain or paint, having everything at hand will set the stage for a successful project.
Once you have all the materials, the design and measurement phase allows you to customize the obelisk to fit your garden’s dimensions and your personal style preferences. Whether you envision a simple and sleek design or a more elaborate and ornate structure, taking the time to plan and measure accurately will ensure that your obelisk turns out just the way you want it.
Assembling the obelisk is where your vision starts to take shape. With precision and attention to detail, carefully join the wooden posts together to form the framework of the obelisk. Ensuring stability and durability during this phase is essential to guarantee that your obelisk will withstand the test of time and weather the elements gracefully.
Once assembled, your wooden garden obelisk will serve as a striking focal point in your garden landscape. Whether placed in a prominent position or nestled among your favourite plants, the obelisk will add vertical interest and create visual depth and dimension in your outdoor space. As climbing plants begin to intertwine around its structure, the obelisk will come to life, evolving and changing with the seasons.
Maintenance of your wooden garden obelisk is relatively straightforward and requires only occasional inspections for signs of wear or damage. Applying a fresh coat of wood stain or paint every few years will not only protect the wood from the elements but also allow you to update the obelisk’s appearance to suit your evolving tastes and preferences.
Building a DIY wooden garden obelisk is a fulfilling and rewarding project that allows you to combine creativity with practicality. Whether you’re an experienced woodworker or a novice DIY enthusiast, following the five essential steps outlined in this guide will enable you to create a beautiful and functional structure that will enhance the beauty of your garden for years to come.
So gather your materials, unleash your creativity, and embark on this delightful journey of crafting your wooden garden obelisk.
Frequently Asked Questions
1. What materials do you need to build a wooden garden obelisk?
To build a wooden garden obelisk, you’ll need sturdy wooden posts or dowels, screws or nails for assembly, a saw for cutting the wood to size, a drill with appropriate bits for drilling holes, measuring tape for precise measurements, and optional embellishments such as wood stain or paint for aesthetics.
2. How tall should your garden obelisk be?
The height of your wooden garden obelisk depends on personal preference and the scale of your garden. Generally, garden obelisks range from 6 to 8 feet tall, but you can adjust the height to suit your specific needs and the layout of your garden.
3. What type of wood is best for building a wooden garden obelisk?
Cedar and pressure-treated lumber are popular choices for building wooden garden obelisks due to their durability and resistance to rot and decay. Cedar is naturally resistant to insects and decay, making it an excellent option for outdoor structures. Pressure-treated lumber is treated with chemicals to prevent rot and decay, making it suitable for long-lasting outdoor use.
4. Do I need to treat the wood before assembling the obelisk?
Treating the wood with a wood preservative or sealant before assembly can help protect it from moisture, rot, and decay, extending its lifespan. Additionally, applying a wood stain or paint can enhance the appearance of the obelisk and add further protection against the elements.
5. How do I secure the obelisk in the ground?
To secure the obelisk in the ground, dig a hole deep enough to accommodate the base of the obelisk and add concrete or gravel for stability. Alternatively, you can attach the obelisk to a sturdy base or anchor it with metal stakes for added support, especially in areas prone to strong winds or inclement weather.
6. Can I customize the design of my garden obelisk?
Yes, you can customize the design of your garden obelisk to suit your preferences and complement your garden’s aesthetic. You can experiment with different shapes, sizes, and decorative elements to create a unique and personalized structure that reflects your style and creativity.
7. How long does it take to build a wooden garden obelisk?
The time it takes to build a wooden garden obelisk depends on factors such as your skill level, the complexity of the design, and the availability of materials and tools. On average, building a garden obelisk can take anywhere from a few hours to a weekend or longer for more intricate designs.
8. Can I move my garden obelisk once it’s assembled?
While it’s possible to move a garden obelisk once it’s assembled, it may require some effort, especially if it’s secured in the ground or attached to a base. Consider the weight and size of the obelisk and enlist the help of others if needed to safely move it to a new location within your garden.